Solar eclipses have captivated people for thousands of years, and with good reason. These magical events are fairly rare, and can only be seen from specific locations around the world. Furthermore, they happen really quickly, which makes effective eclipse photography challenging to say the least.
If you’re interested in learning how to photograph a solar eclipse, the key is to prepare for the event well in advance. This doesn’t just mean keeping tabs on celestial phenomena; it also means having all the equipment you’ll need on hand for when the magic moment strikes.
Plus, prepping beforehand means that you’re more likely to capture some spectacular images to share in your online portfolio website.
What is a Total Solar Eclipse, Exactly?
People in the Middle Ages believed that a massive celestial dragon caused eclipses by temporarily swallowing the sun. Unfortunately for those of us with a creative lean, the real story is a bit more logical (but no less fascinating).
Basically, solar eclipses happen when the moon moves between the sun and the Earth. When this type of alignment occurs, the moon will cast a dark shadow (an umbra) on the planet’s surface. This umbra gives the impression that the moon is blocking out the sun.
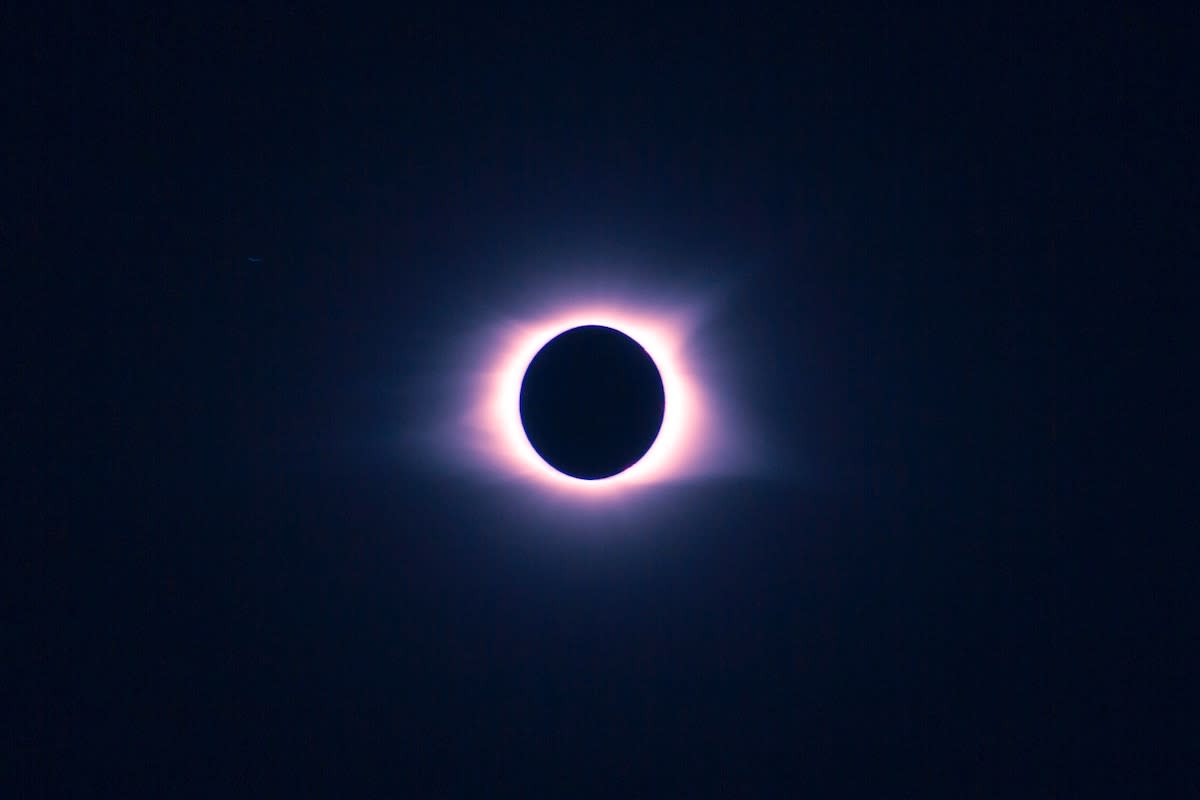
In fact, when a true full solar eclipse happens—also referred to as “totality”—the sun’s light is completely blocked out as the moon moves across it, turning day into night for just a few minutes.
Eclipse Phases
If you’re keeping tabs on lunar and solar phases, take note that these kinds of total eclipses only happen during the new moon—never when it’s full.
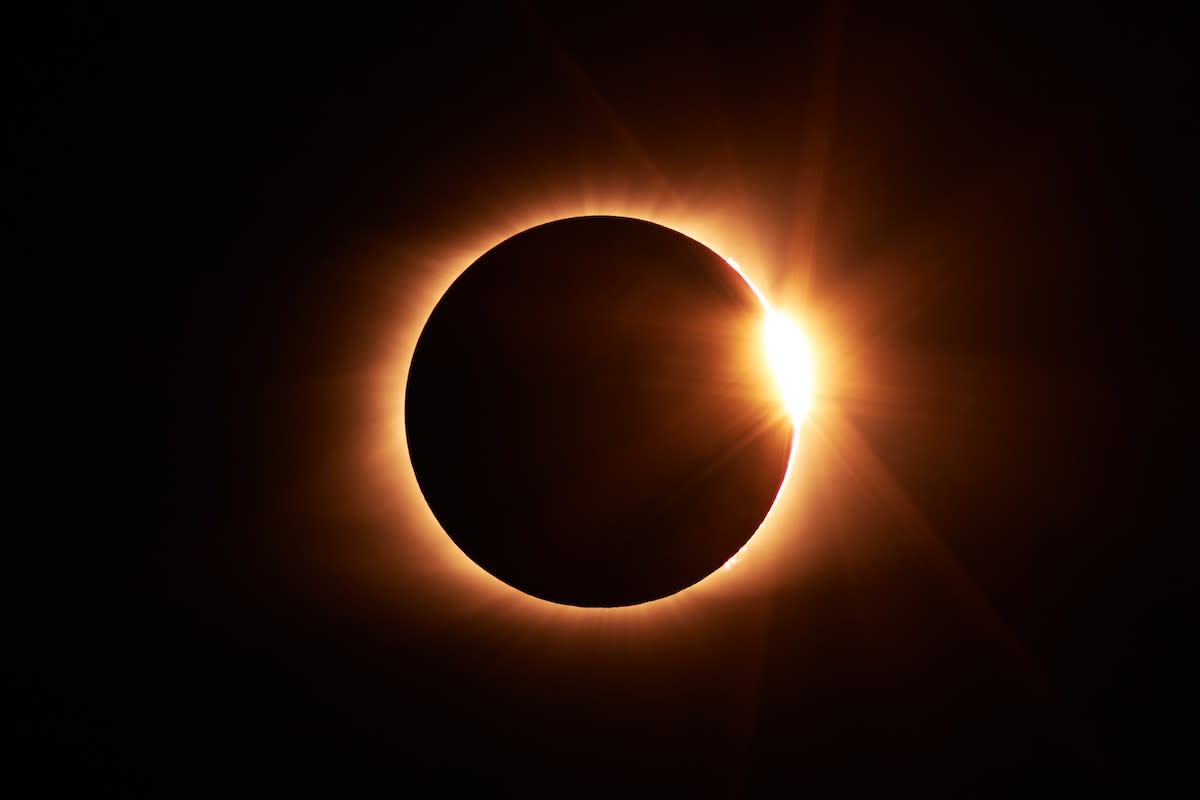
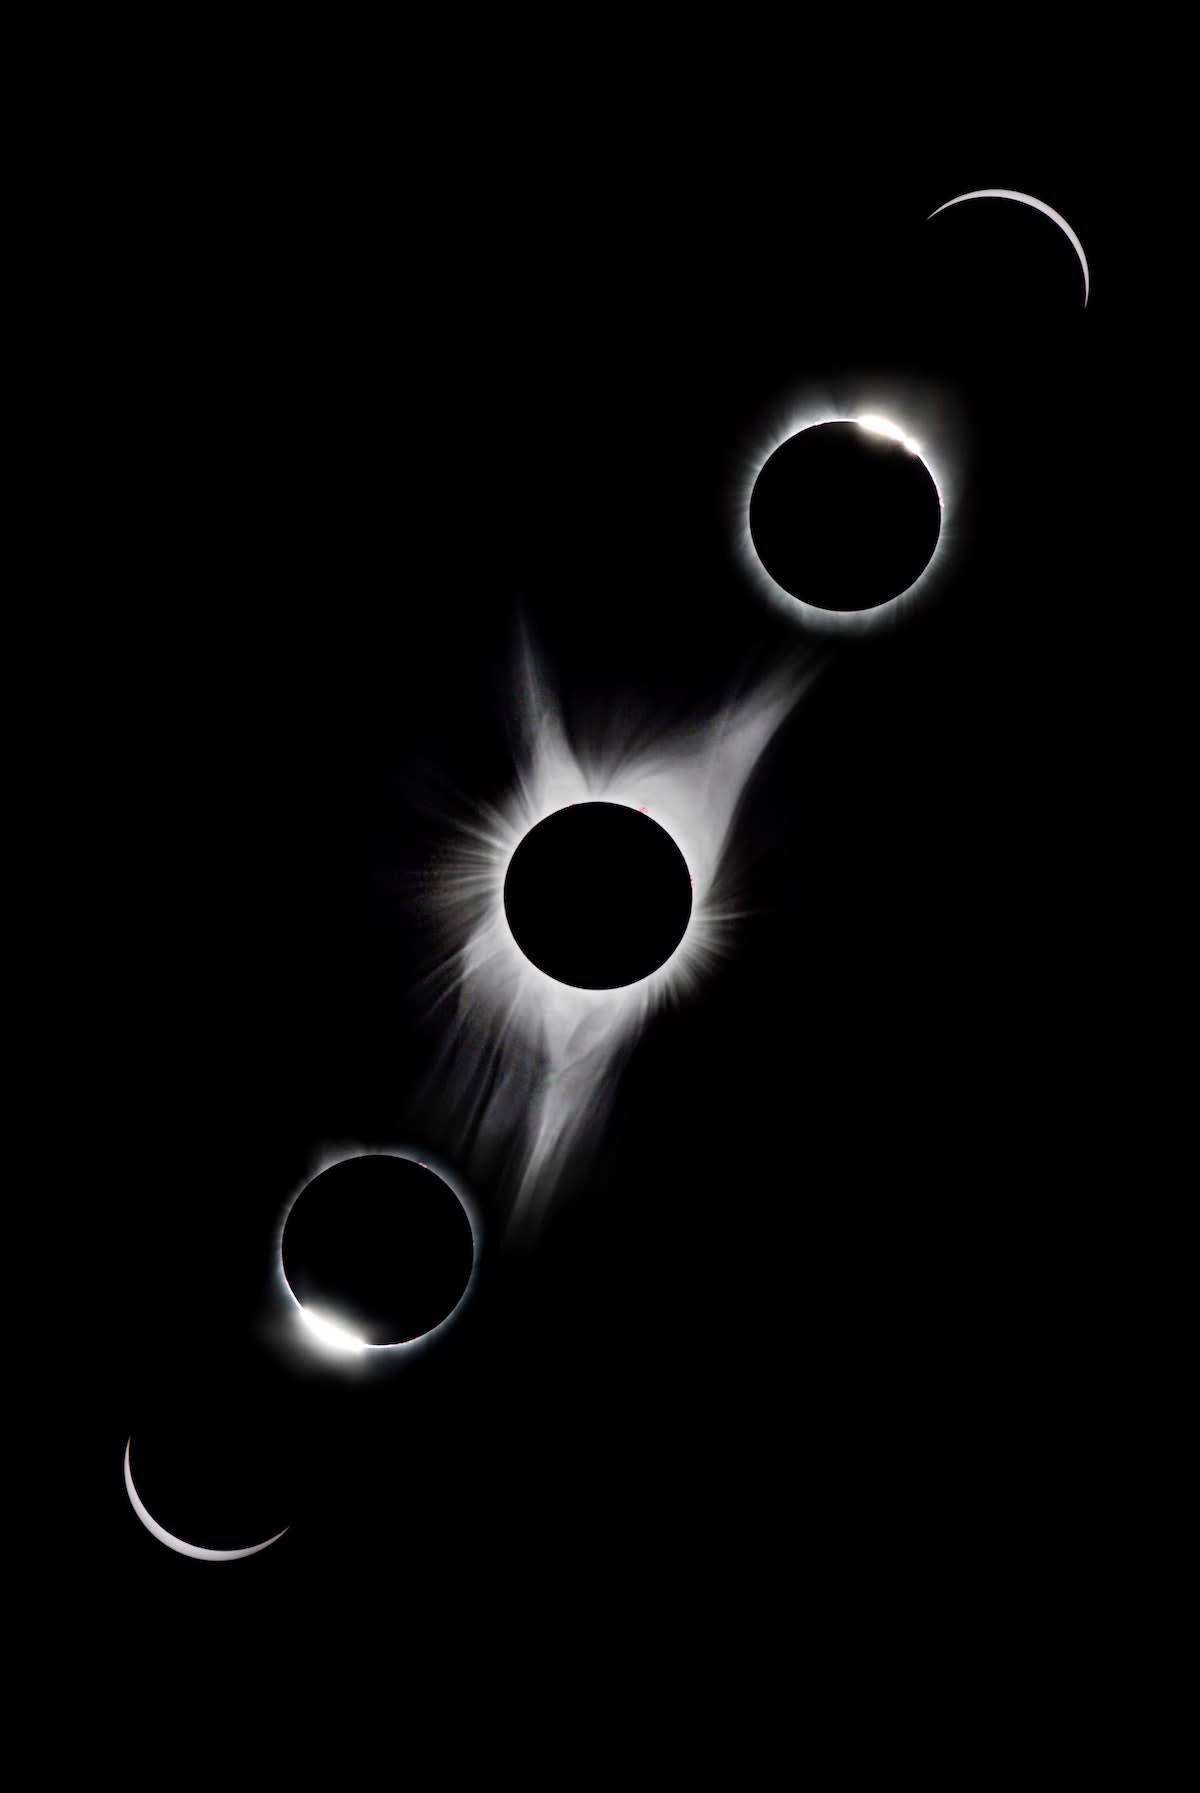
Stage 1: Partial eclipse. This is when the moon just starts shifting over the sun, making it look like someone’s bitten a piece out of it. Stage 2: Total eclipse. The moon moves over the center of the sun and may cause a diamond ring effect. Stage 3: Maximum eclipse/totality. At this point, the sun is totally covered by the moon. Everything goes dark, the temperature cools, and both birds and animals go really quiet. Stage 4: Total eclipse finishes. The sun begins to reappear as the moon moves onward. Stage 5: Partial eclipse ends. A reverse missing bite appears at the sun’s opposite edge as the moon continues and then stops blocking any light.
Key Sights During the Eclipse
You’ll see different signs before, during, and after the eclipse, and you can gauge its progress by when these show up.
- Shadow Bands: These wavy lines alternate between dark and light, and appear about a minute before totality. You’ll mostly see them on the ground around you, as well as on nearby walls.
- Diamond Ring: The sun’s outer atmosphere (solar corona) becomes visible around 12-15 seconds before totality.
- Prominent Corona: This is visible as a faint ray ring around the moon’s silhouetted form.
- Baily’s Beads: These little blobs of light form around the moon’s edge around five seconds before totality. They’re formed by peaks and valleys on the moon’s surface.
- Chromosphere: The sun has a lower layer that displays a reddish glow a scant second or two before totality.
These will occur in reverse order as the moon moves away.
Different Types of Solar Eclipses
In contrast to full solar eclipses, partial and annular solar eclipses occur when the moon only obscures part of the sun. Since the moon’s orbit around the Earth is elliptical—or oval—its distance from us can vary from approximately 220,000 to 250,000 miles. This is why the moon can appear larger or smaller in the sky, depending on what time of year it is.
Total eclipses happen when the moon is on the near side of its orbit since appears larger than the sun. Partial eclipses occur when the moon is on its orbit’s far side, thus appearing smaller than the sun. You can’t cover a nickel with a dime, right?
If you learn how to photograph a partial solar eclipse, you’ll be able to photograph partial eclipses too. Just keep in mind that using a filter for solar eclipse photography is just as important for a partial eclipse as with a total one. Moreso, even, since there’s no totality “safe zone” in which you can look at the sun without protective eyewear or filters.
Cameras for Photographing Solar Eclipses
Now, when it comes to photographing the solar eclipse, you’ll be happy to know that you don’t need a professional DSLR camera. Truth be told, you can use pretty much any camera, as long as you take necessary precautions to protect it—and your own eyes—during the event.
DSLR Benefits
A lot of people prefer to use DSLR cameras because they’re so versatile. The downside to these is that they’re also quite expensive, which can be prohibitive to newbie photographers.
If you already have one, great! You’ll be able to use all different kinds of lenses, depending on what kind of eclipse shots you’d like to capture. Telephoto and wide-angle lenses are options, and some people even hook their DLSR cameras directly to telescopes in order to fill the whole frame with the dark sun’s spooky majesty.
Point-and-Shoot Digital Cameras
As mentioned, you don’t need a DSLR for solar eclipse photography. Your trusty point-and-shoot camera is just fine for taking pictures of a solar eclipse.
The downside, however, is that you probably won’t be able to capture really crisp, clear images of the eclipse’s totality. What you will be able to do is snap images of the partial eclipse, both before and after the main event.
If you’re going this route, most pros recommend that you secure a solar filter to a telescope, use a wide-field eyepiece, and then use your camera with the lens held close. You’ll use the LCD screen built into your camera to position the sun’s image where you want to.
A word of warning: if you try to take photos of the sun/eclipse without the necessary solar eclipse filter, you can destroy your camera and telescope. Even worse, you may end up with permanent eye damage in the process.
Keeping your retinas from melting is a much higher priority than taking some cool photographs, so please take the necessary safety precautions.
Using a Smartphone for Solar Eclipse Photography
If you’re among the countless people who use their phones to snap photos of anything and everything, then you’re in luck: you can also use your smartphone camera for eclipse photography.
Do you have a telescope? Slap a solar filter on that bad boy and use a universal Gosky mount to attach your phone to it. Or, get yourself a commercial bracket: you can use this to secure your phone to the telescope’s eyepiece for sturdier support.
Additionally, check out some of the apps out there that allow you to manually focus and/or shoot in RAW.
Specific Camera Lens for a Solar Eclipse
Since the sun is over 90 million miles away from this planet, we don’t really get an accurate scale of how large it is. Instead, it gives the impression that it’s around the same size as the moon… which is why the latter can block out its light when it moves between it and the Earth.
That means the sun will be very small in your camera’s frame if you’re using a wide-angle lens. It won’t even fill the frame if you’re using a standard-length telephoto lens. The only way you’ll get a larger image of it is if you use a lens that goes past 300mm focal length.
Consider that a 200mm telephoto lens will offer you an image that’s several times larger than a DSLR 18mm one.
That said, try to avoid using an extreme telephoto lens, which will likely make you crop out some of the best parts of the eclipse’s corona. Aim for a focal length that’s somewhere between 500mm and 1000mm for best results.
Using a Telescope with a Solar Eclipse Lens Filter
There are dedicated solar-viewing telescopes out there, but if you’re not using one of these, you need to use a solar filter. Furthermore, you need to use one that attaches to the scope’s objective lens, not one of the small filters that you can attach to the telescope’s eyepiece.
It’s important to place a filter over the finder scope too. On the off chance that your telescope doesn’t have threaded front openings to screw filters into, using a filter sheet is another option.
Don’t ever look at the sun through a telescope that doesn’t have a solar filter unless you want to risk blindness. Sure, eclipses look amazing when they’re magnified, but you don’t want that to be the last image you’ll ever see.
Using Eclipse Filters to Protect Your Camera
We’ve already stressed how important it is to use a solar filter for eclipse photography—now we’ll get into which one(s) are best to use. Capturing an eclipse is a great opportunity for any photographer, but only if you protect your eyes (and your camera) properly.
It might surprise you to learn that you shouldn’t use a neutral density (ND) filter for solar eclipse photography, even if you stack a few of them. This is because ND filters only block light that’s visible. Since the sun gives off infrared and UV light across a hugely wide spectrum, the ND filters won’t block it, so there’s a risk of camera (and eye) damage.
Instead, choose a specific solar eclipse camera filter, which will protect you and your equipment during the partial eclipse phases. Note: the only time it’s safe to remove the solar eclipse camera lens filter is during the eclipse totality: the few minutes when the moon totally obscures the sun.
When it comes to buying a filter, look for one that screws or snaps onto the end of your camera lens, rather than the kind that slips between your lens and the camera. Just make sure to confirm that the filter’s thread size matches the thread size of the lens you’ll be using.
These screw-on, white-light filters are sometimes made of optical glass, while others are made of Mylar film. When you’re shopping, be sure to check out the details as to how they should be used. Some can only be used for LCD screens or electronic viewfinders, so you wouldn’t be able to look through them using an eyepiece.
Camera Settings for a Solar Eclipse
Now that we’ve talked about how to photograph a total solar eclipse using the right cameras and filters, we can get to the fun stuff: settings.
Use a Fairly High ISO Setting. By doing this, you can minimize blurring from tracking errors and/or vibrations. Just set the camera’s sensitivity to at least ISO 400 in order to keep exposures short.
Switch to Manual Mode. This allows you to have full control over all your DSLR camera’s exposure and focus settings. Turn off the pop-up flash while you’re at it.
Focus Very Carefully. Since autofocus isn’t an option here, it’s important to take your time to focus properly so you get the best images possible. As mentioned earlier, a solar eclipse’s totality only lasts a few short minutes!
Some veteran eclipse photographers recommend pre-focusing your camera on a clear night in advance of the eclipse by focusing on a bright star. You’ll need to take the solar filter off to do this.
Alternatively, put the filter back on and try to focus on a sunspot early in the morning before the eclipse takes place. Then lock the telescope focuser or mark the focus ring with a bit of masking tape so you don’t lose your settings.
Choose Your Camera’s Highest Resolution. RAW format is ideal for eclipse photography, but you can also use your camera’s highest-quality JPEG setting.
Test Your Imaging Setup. Consider this a dress rehearsal before the official event. You’ll have a better idea of how to photograph the solar eclipse if you’ve tried out some techniques as a warmup.
Using that eclipse camera filter to protect your eyes (we seriously cannot stress this enough), take a bunch of trial photos of the sun. This will give you some solid insights about possible focus problems, as well as vibrations and vignetting.
Bracket Exposures
If you’re not familiar with bracketing yet, it’s basically using various shutter speeds to take series of different shots. You’ll have a lot of images to wade through, but you’ll likely find some gems in amongst the “meh”.
Other Equipment
Although these extra accouterments aren’t absolutely necessary, they might make your adventures in solar eclipse photography a bit easier.
Tripod
We’ve mentioned using a tripod: this is important to keep your camera setup supported sturdily so you can get clear, jitter-free shots. Choose a strong, sturdy tripod that can support all your gear.
Remote Shutter Release
Since your shutter speeds will slow when it gets dark, you’ll need to trigger your camera remotely during the eclipse’s totality. You can choose an electronic release or cable release, or even a mobile device. That last one is ideal to avoid any camera vibrations. No one wants a blurry eclipse photo.
Additional Protection
In addition to the filter for photographing the solar eclipse, it’s a good idea to have protective eyewear at hand—both while prepping for the eclipse, and during it. You can find a decent pair on Amazon or on the Eclipse Glasses website.
Since looking at the sun can cause blindness (as we’ve mentioned several times here), safety precautions are absolutely vital. Sunglasses won’t do the trick, and even a quick glance at the eclipse to monitor its progress may do significant damage.
While it’s safe to look at the total eclipse during the few minutes when it’s in totality, but those minutes slip by really quickly. Observing it with a naked eye should never happen until the Baily’s beads have disappeared completely. Many websites will list how long the totality is going to last in your area, so keep a stopwatch handy and set it to warn you a good 30 seconds before the totality is scheduled to end.
As a final note, never keep your camera pointed at the sun unless the lens is covered by an eclipse filter, even if it’s turned off.
Once you’ve taken all your photos and edited them to your heart’s content, you can display them in your online photography portfolio. If you don’t have one yet, there’s really no better way to share your hard work (and spectacular skill set) with peers and pros alike. Make sure to choose one that features templates that will complement your work and highlight your unique brand.
Serious about shooting outdoors? Here’s more inspiration:
Here Are The Very Best Landscape Lenses
The Complete Guide To Sunset Photography
A Designer’s Epic Nine-Month Quest For Sunlight
