You’ve put in a lot of work capturing and editing your image, and if a photograph is worth a thousand words, the metadata of that picture is worth tenfold.
All sorts of digital files have metadata—video, music, PDFs, and image files. You might have heard of metadata referred to as “data about data.”
For photographers, metadata comes up regularly when in the context of photo management. Image metadata is information about the file that helps photographers categorize their photos and protect their work.
In this guide to metadata in photography, we’ll discuss reasons why it may be a good idea to optimize your image metadata, how to find metadata on a photo, and edit it to include copyright information in Adobe Photoshop and Illustrator.
What Is Photo Metadata?
The primary goal of photo metadata is to make working with and managing digital assets easier to access. Without some sort of system for organization, your digital assets would be buried beneath a sea of cluttered files.
Metadata on photos describes details about the photo, and it’s important to photographers for two main functions:
Organization – It allows you to create a well-organized library of your work, an essential component of efficient digital asset management.
Copyright – If you publish your work online, the metadata can convey information about usage rights and allows you to maintain proof of ownership of your work.
Adding metadata to images is virtually instantaneous—but it’s not perfect.
Some components of image metadata are recorded automatically by your camera or phone. This is called EXIF data (Exchangeable Image File Format). This metadata on photos is very basic and may include a date and time stamp, shooting location, and camera settings (ISO, aperture, f-stop).
You can also manually enter metadata, allowing you to input more information that you deem relevant at your work, improving your photos searchability online, and provides information on how others may use your work and contact you.
What Metadata Is Stored With An Image File?
Photo metadata has information about the content, location, camera settings, licensing and copyrights, and the photographer’s contact information.
Let’s compare your collection of photos and its metadata to a library of books and the Dewey decimal classification system—the world’s most popular book classification system. The books are categorized by subject and author name in the Dewey decimal system, making a book easy to locate within an entire building filled floor-to-ceiling with books.
Metadata is stored internally on a RAW image file, JPEG, TIFF, or DNG file, and that photo metadata stays with that digital image for its entire lifetime. You can think of internal metadata like the Dewey decimal label on a book’s spine on your library shelf.
Metadata can also be stored externally from the image file, like a Dewey decimal card. That card relays valuable information like the subject, author, and location in the library.
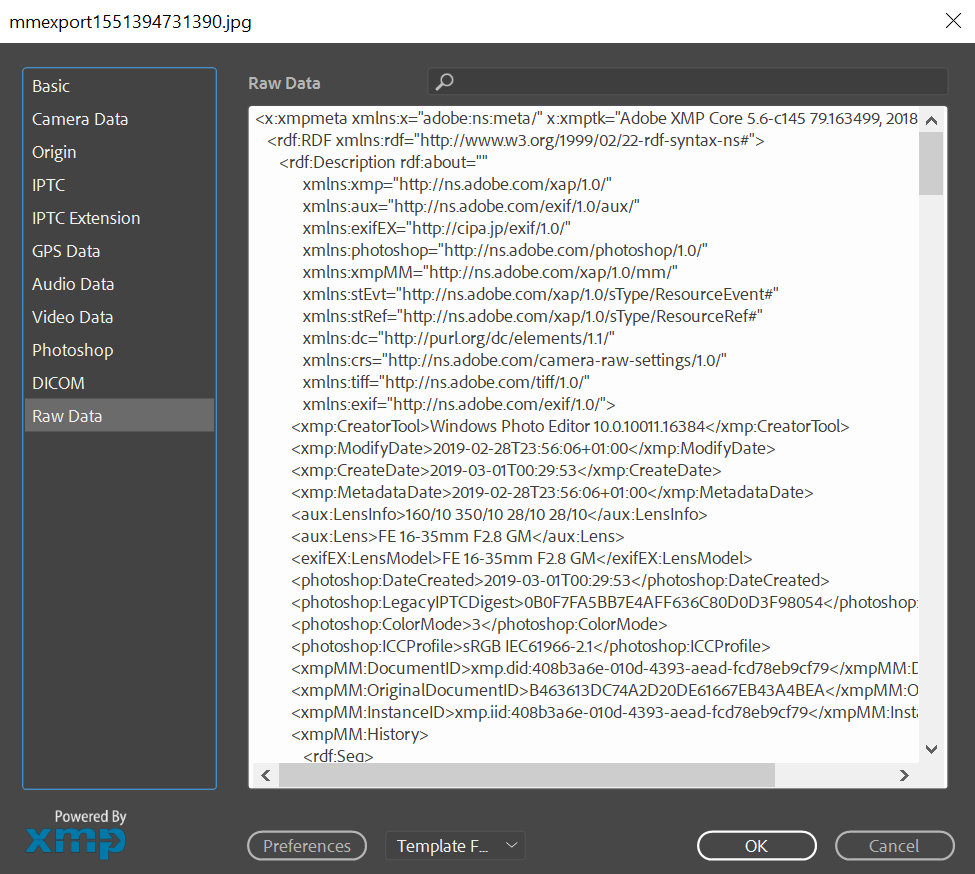
Different Metadata Formats For Photos
As computer programs have adapted to become more efficient at handling information, different metadata formats evolved to efficiently transmit and recall data, some of which are directly written on the files, while others can be stored separately.
These different metadata formats are essentially different places you can add information about your images. We’ll go over the most commonly used types of metadata on photos.
The three main types of metadata include:
EXIF Data (Exchangeable Image File Format)
IPTC Data (International Press Telecommunications Council)
XMP Data (Extensible Metadata Platform)
1. EXIF Data
Exchangeable Image File Format is metadata automatically inscribed to an image file by the camera or phone that captured the image.
Back in the days of film photography, it was up to the photographers to document all the camera settings and location information with pen and paper. Today, all this information is recorded with the snap of a shutter.
EXIF data can provide information, including:
Camera make/model
Camera settings (shutter speed, aperture, ISO)
Date and time of the photo
Location (GPS coordinates)
Image resolution
Lens model
Whether or not the image had been altered with a graphics program
White balance
Sometimes photographers uploading their photos online will strip their EXIF data to protect their photography style or reduce the image file size to save on website loading times.
EXIF data isn’t readily accessible to someone viewing your image on the web. EXIF data is embedded into a digital file, which means you’ll need the right tools to inspect this information from a photograph viewed online.
2. IPTC Data
International Press Telecommunications Council (IPTIC) is a media organization that advocates for digital photo metadata standards to allow for multimedia exchange between photographers, news organizations, archivists, and developers.
Like EXIF metadata, IPTC is embedded into the image file. Rather than technical information about the gear and location, the IPTC metadata is considered administrative information about the image, which is more specific to content creators and archivists.
Some examples of IPTC metadata include:
Creator’s information and contact details
Copyright information
Descriptive information about the image
Keywords
Permissions and licenses
Photograph title and captions
Rights usage terms
For professional photographers sharing work online, IPTC data is advantageous for copyright protection.
IPTC photo metadata is also used by search engines like Google to categorize the millions of images on the web. Since search engine algorithms can’t view images the way humans do, it relies heavily on this information to understand it’s content. Writing intentional metadata to cater to search engines, maximizes your content’s exposure online. This practice is also a key component of Search Engine Optimization (SEO).
You can program your camera to record your copyright information onto every image you take automatically. However, most people add metadata to photos during the post-production editing process in Lightroom or Photoshop—We’ll get into how you can do this shortly.
3. XMP Data
Extensible Metadata Platform is the latest metadata format created by Adobe Systems to standardize metadata. It includes information from EXIF, IPTC, and other formats in a way that’s easily accessible and manageable—but it now includes information about how you edited your RAW image file so that you can always revert to the original if needed.
The main advantage to XMP is that it’s not as constrained as the other two types we’ve discussed in that it allows you to enter multiple values for one property. XMP was designed to improve workflow automation and processing within the Adobe applications family and other publishing workflows.
XMP information can be embedded into the original file or stored separately in a sidecar file (externally). The XMP metadata remains with the file even if the format changes from a Photoshop file (PSD) to a compressed image (JPEG).
How To View Your Photo Metadata
Learning how to find metadata in a photo file is advantageous for beginner photographers and creators looking for information about the camera settings and the tools used in creating a particular photograph.
Publishers will also read photo metadata for usage rights and to get in contact with the photographer.
Without any additional software, your computer should give you a basic overview of your image’s metadata. We’ll go over how you can access your image’s EXIF data on Windows and OS systems.
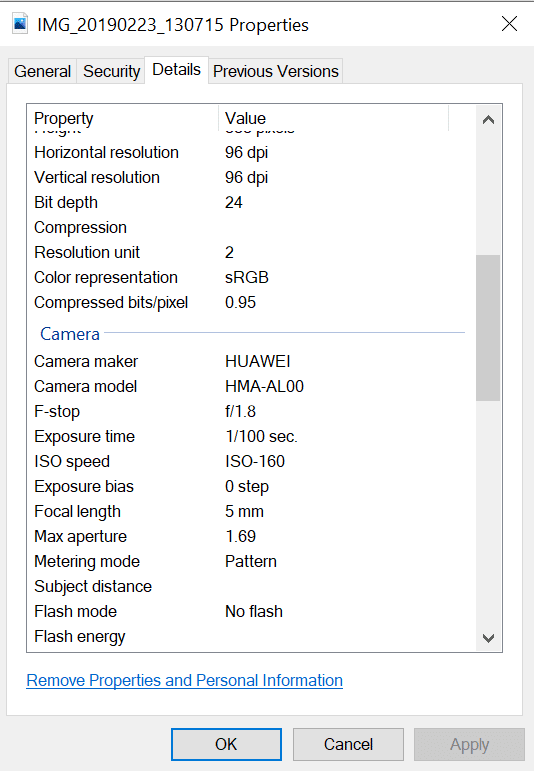
How To View Your Image Metadata On Windows
Step 1: Right-click your image file on your desktop or file folder and select “Properties.”
Step 2: Once you’re in the file properties, navigate to the “Details” tab.
Here, you can find the metadata automatically written to the image with the option to remove properties and personal information. People may do this before posting an image to a website to protect their privacy.
How To View Your Image Metadata On A Mac
Step 1: Open the image with Preview.
Step 2: Select “Tool” and choose “Show Inspector.” The keyboard shortcut for this step is Command + I, which will open a small “More Info” window.
Step 3: Click the information icon on the menu bar to open the display showing you General, EXIF, IPTC, and TIFF information about your image.
How To Add Metadata To Photos
Now that you know where to find your image’s metadata, we’ll review how you can edit these fields to remove information or add information relevant to your work.
The easiest workflow for editing your photo metadata is in your photo editing software like Adobe Photoshop or Illustrator. Adobe has created multiple tools that allow you to create metadata presets for an efficient workflow to improve your collection organization and apply your creator information, which is important if you plan to sell your photographs.
How To Edit Your Metadata In Adobe Lightroom
In Lightroom, adding metadata to your photos is simple. We’ll discuss two ways of adding metadata in your workflow.
On the import screen, when you’re selecting the images from your device to add to your Lightroom library, navigate to the right-hand menu bar and select “Apply During Import.”
Select the dropdown box for metadata, where you’ll find options to select “New” or “Edit Presets.”
Doing this step during import applies a general set of metadata to your images selected, but we recommend jumping to each individual image to add more detailed information to each image. As more descriptive metadata changes depending on the content of the image.
How To Create A Metadata Template In Adobe Lightroom
In the import window, select the dropdown menu next to “Metadata” and click on “Edit Presets.”
This will open up a window that will allow you to create a metadata template which you can apply to all your imported images.
Some information you might want to apply to all your images includes your IPTC Copyright and Creator Information.
IPTC Copyright Information
Once you share your image online, there’s virtually no way to know how others will use your image. Adding copyright information to your work helps protect your image.
Sometimes professional photographers don’t own the final image, in which case you’ll need to address who owns the image—be sure to specify if you’re an independent contractor, agency, or a staff photographer working for a media company.
The owner of an image can license their work, which means specifying who can use the image. You can add the default phrase, “All rights reserved,” to indicate that no one can reproduce, distribute, or adapt any part of your work without your permission.
ITPC Creator Information
If you’re working with a media company, they may instruct you on the IPTC information you need to fill out according to their guidelines. This section is basically a calling card for your photography services.
Editors, publishers, or buyers who know where to access metadata information can connect with you to verify usage rights or purchase more of your work.
Now onto more descriptive metadata you should apply to individual images to further improve your file organization and SEO, should you upload these images online.
Once you’ve added your images to your Lightroom library, you’ll find information about your image, including your metadata, on the right-hand side.
Here, we recommend adjusting the metadata to suit specific details about individual images. Some of the fields you should consider filling in include the image title, caption, and keywords.
Title
The objective of this field is to make the title descriptive and identifiable.
If you’re adding metadata for your images for personal use, clever and artistic titles are fine—but when it comes to professional use and sharing your work online, you want to write descriptive titles.
Metadata is about helping humans and technology understand your work and catalog it.
When writing a title, consider what the end-user is typing in a search box to pull up an image like yours. Writing an accurate and descriptive title for the image helps to increase your photo’s exposure online.
Caption/ Description
A good rule of thumb for this section is to write what you see in the image related to the context of use. Here, you can get a little more creative in your photo description—but don’t let yourself get too carried away.
The main goal here is to describe the image accurately. The words used in this section also help with the image’s searchability on the web for certain keywords.
Use common phrases people would type into their Google search to find your image. This helps to improve the relevance of your photo for web searches.
Keywords
During the import phase in Lightroom, you’ll find a “Keywords” box, where you can insert relevant organizational tags to organize your images in your library by location or subject.
These keywords essentially function as search terms, improving the image’s searchability on search engines such as Google, and helps you easily locate your images in your library.
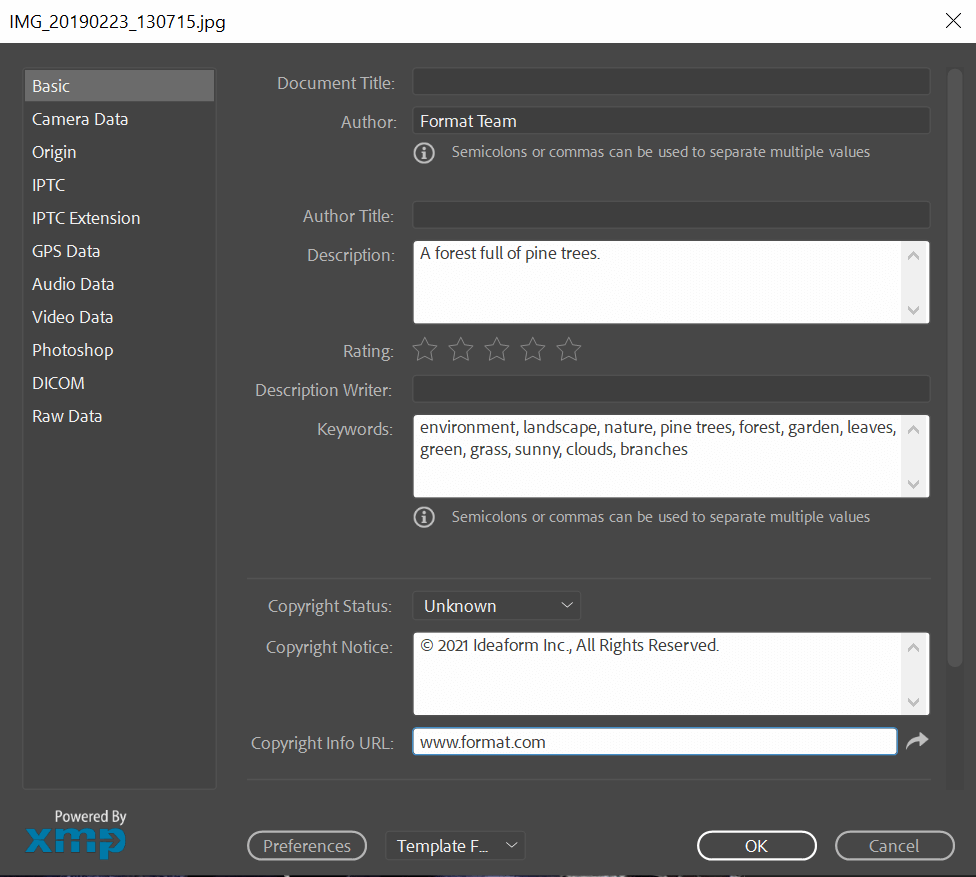
How To Add Copyright Metadata In Photoshop
To add copyright metadata in Photoshop, you’ll want to access your metadata dialog box.
You’ll find it under “File” and click “File Info.” You can add your metadata here in the related fields, but to get to the copyright metadata, you’ll click the dropdown icon on the tabs bar and select “Description.”
There’s a dropdown menu that allows you to select your Copyright status. You want to make sure “Copyrighted” is highlighted and input your Copyright notice, for example, ©2021 [Your Business’ Name].
When you’re done, hit “OK.” You’ll notice there’s a small “©” symbol on your document tab. This indicates that you’ve successfully added your copyrighted metadata to the file.
What Next?
Including appropriate metadata on photos is an essential part of a professional photographer’s workflow for optimizing your organization, increasing your chances of exposure online, and protecting your work.
Whether you’re an established photographer or a budding professional, we hope this guide to image metadata helps you with your future work.
Here are more SEO resources to help your portfolio rank.
Here Are the 50 Best Free SEO Tools To Use For Your Website


