Taking a great photo can seem simple: just point and shoot. But anyone who’s learned how to take professional photos knows that there’s a lot more to it than that.
First, training your eye to really look and consider a scene, light, and subjects–whether they be landscape, architecture, people, or objects. In time you can hone your instincts, and know when the time is right for an incredible photo.
If you want to improve your photography, we have some tips from the fundamentals to the technical. Once you get a hang of these simple pro techniques, it should vastly improve your results.
The best part about knowing how to take professional photos? It leads to new opportunities. The more professional your work, the better your online photography portfolio will look. And the better your online photography portfolio looks, the more photography jobs you will land.
1. Master the Fundamentals of Composition
Choose a Strong Focal Point
The focal point of a photo is the main point of interest. It could be anything from a tree, to a building, to a person (or their eyes). Finding a strong focal point is one of the fundamental steps of how to take professional photos. So when you’re planning out or setting up a shot, you should stop and ask yourself, “What do I see? What do I want to focus on?”
Once you know what your focal point is, the rules of composition below will help you create an interesting image that draws in and holds the viewer’s attention.
Follow the Rule of Thirds
Instead of positioning the focal point in the center of your shot, it can make for a more interesting composition if you follow the rule of thirds and place the most important elements off center. This rule is based on the theory that our eyes will move across an image, and that placing the focus on an element off center will create a more dynamic composition.
Depending on your camera (or phone), you can set your screen or viewfinder to display a grid in order to assist you in your composition. That said, maybe you’re starting with a simple 35mm manual camera, as many photography students do. So imagine there’s a tic-tac-toe grid in front of your shot. That means two lines divide your frame into thirds vertically, and two lines divide it into thirds horizontally.
You should place the subject and other important elements in your shot along these lines or at one of the four points where they intersect.
Placing a subject dead center can still be appropriate in some scenarios, but knowing this rule and how to best follow it will also teach you when it’s the right time to break it.
Build Your Portfolio With Format
Rated #1 online portfolio builder by photographers.
Use Leading Lines
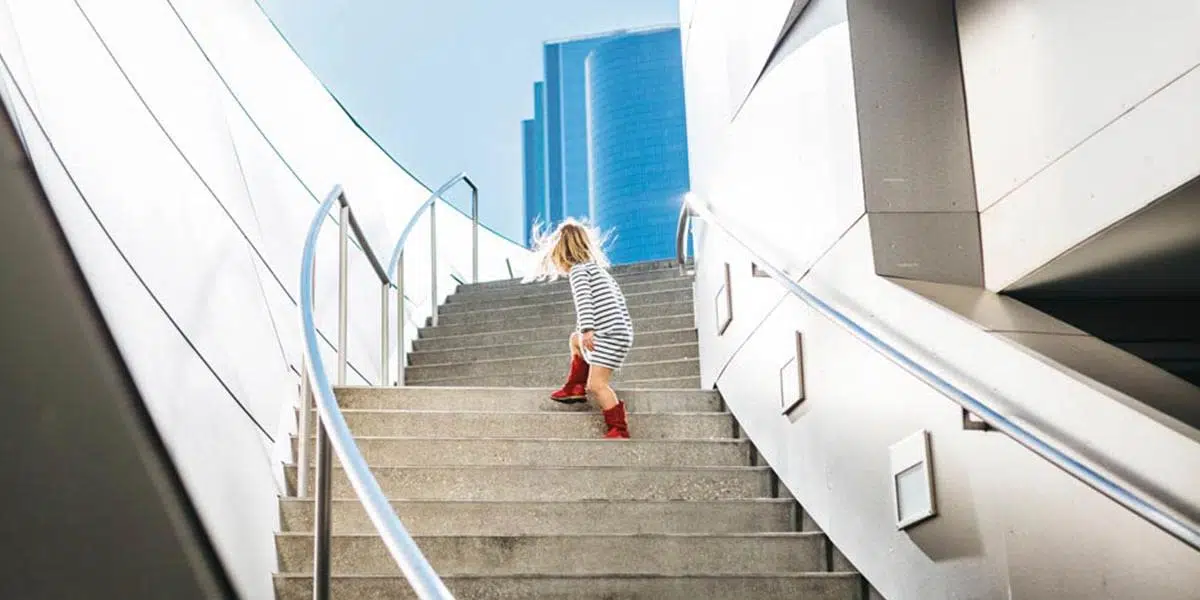
Leading lines are shapes in your shot that can help guide a viewer’s eyes to the focal point. They can be created with an object or other delineation that creates a line in your photo, like roads, fences, buildings, long hallways, trees, or shadows.
The trick is moving a viewer’s attention where you want it to go. That can include drawing their eyes straight to your subject, or leading them on a kind of visual journey through your composition.
The direction of your leading lines can also change the mood of your compositions. For example, vertical leading lines can convey a powerful, imposing mood, while horizontal leading lines tend to be associated with calm and tranquility. For more information on why this technique can help with taking professional photos, check out this guide on how to use leading lines in your photography.
Change Your Perspective
Perspective has a massive impact on the composition of any photo. By simply adjusting the angle or distance from which you shoot, you can completely change the mood and meaning of your images.
You can experiment with this by shooting the same subject from above and below. A bird’s-eye view can make a person in your shot seem small, while shooting from below can make it look like the same person is now towering over you. Shooting from far away can make a person look insignificant, and highlight the scale of a landscape, while getting up close and having them fill the frame can convey a sense of importance.
When setting up any shot, spend some time thinking about perspective and how you want your subject matter to appear. Don’t be afraid to walk around your location to search for interesting angles, and see how drastically it can change the composition’s mood. Especially when shooting digitally, try taking shots of all the angles you find interesting. This is how photographers learn their craft. Trial and error, looking, moving, looking and moving some more. Thankfully, carrying a camera does excuse a lot of strange behavior.
Create Depth

Finding ways to convey depth is another important step in establishing the fundamentals of photography. Without knowing how to create depth, both in positioning and focus, your photos can end up feeling very flat and boring.
The best way to convey depth is to include some elements in the foreground, middle ground, and background. So for example, instead of shooting your portraits with the person standing up against a wall, bring them closer to the camera, or find a better background with strong lines that continue behind your subject, making their position in the foreground clear.
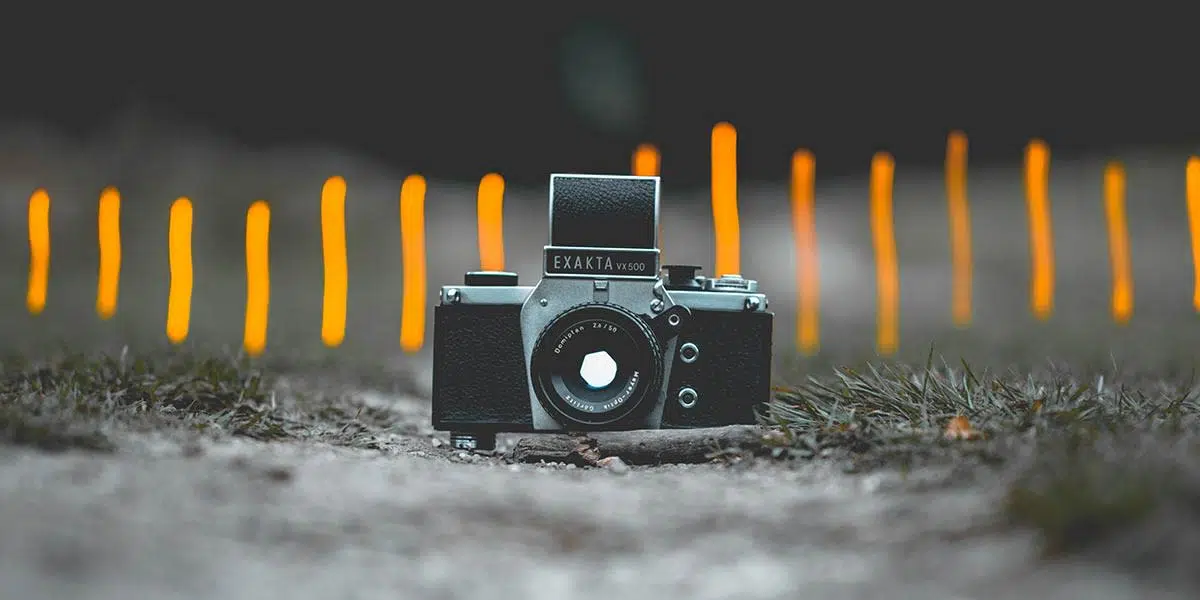
Depth can also be determined in-camera by setting your aperture to its widest point, creating a shallow depth of field. This effect is referred to as bokeh.
In this kind of composition, you’re de-prioritizing the other elements in your image, and instead you’re rendering these shapes into soft textures. The result is your subject will seem to really pop out of the background or apart from a blurred foreground.
Frame Your Shot
Framing is another technique used to create an amazing photograph: find something that can act as a natural frame for your composition, and then place your subject inside of it. Some examples include a doorway, a window, some foliage, or a hole in a wall. This type of framing can direct the viewer’s attention to your focal point.
Also, if the frame is relatively close to the camera, it can act as a foreground layer that adds depth to your image. Similar to creating a bokeh effect in the background, if you manually focus and zoom in on a subject in the middle ground, you can keep the frame out of focus, which makes sure it doesn’t draw attention away from your focal point.
Fill the Frame
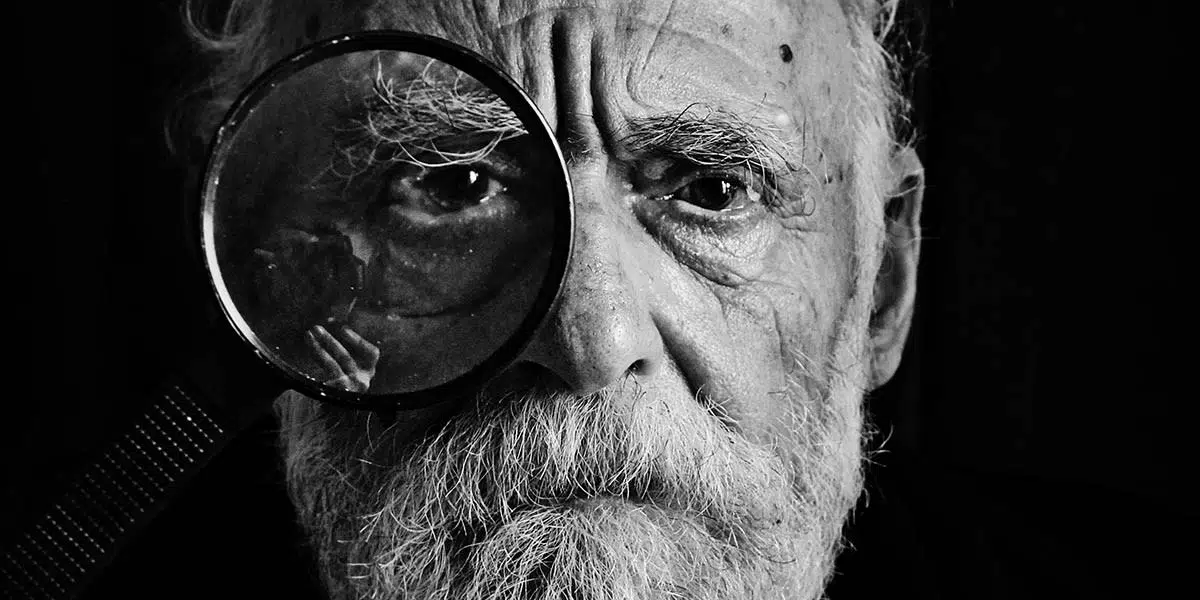
Photography students are often taught to “fill the frame.” It’s great advice because if you leave too much space around your main subject, distracting elements in the background can take away from your composition.
So, for example, when shooting a portrait, you might decide to just include the person from the waist up, or, even better, to fill the frame with their face. It makes for a much more captivating and professional-looking photo when all the unneeded extra space is cropped out.
If you include negative space, be extra thoughtful about the composition of your subject within that space. The negative space should work for you to enhance the image, not detract.
Look for Patterns and Symmetry—Then Disrupt Them
Including patterns or symmetrical elements in your photos can make them more eye-catching. Humans have a tendency to search for and spot patterns–which means anything that could have a pattern will hold a gaze longer.
Including an element that disrupts the pattern makes for an interesting focal point. A simple example would be a picket fence with one broken or missing picket.
2. Light it Up

Often overlooked by inexperienced photographers, lighting is essential to photography and can make or break an image. The first step is making sure you have enough light that your subject is visible. If there’s not enough light, your camera may struggle to capture the details in the scene. When you are attempting to shoot in a location where there’s not enough light, you have choices: add more artificially (if you have equipment) or come back to the scene at a different time of day.
If you happen to be shooting with your camera on automatic settings (which is not how to take professional photos, but more on that later!), it will use a high ISO setting or extra-long exposure, and you’ll probably end up with grainy or blurry results. If you try to brighten things up in Photoshop, you may find you have to make massive adjustments, which can also result in a low-quality image.
On the other hand, if there’s too much hard light in your shots, it can ruin your photo with unwanted shadows. Spend some time carefully picking your location, time of day and the angle you shoot from to ensure there’s enough light in the scene.
Lighting Equipment
Relying solely on available light is not always the best idea, especially for certain types of photography–i.e. headshots. Professional photographers spend a lot of time planning out lighting and they use a range of lighting equipment. But you don’t need to spend a lot of money to take the lighting in your photography to the next level.
Reflectors
One affordable piece of equipment that will help you manage your lighting is a reflector. You could pick up a 5-in-1 light reflector for around $30, and it will give you a lot of options for manipulating light in your images. This versatile tool comes with reversible covers made from different types of reflective materials. For instance, they have silver covers that reflect lots of bright light, gold to add warmth to a cold scene, a gauzy white that bounces softer light, and black covers for helping you remove light from a scene.
A simple way to start manipulating light in your shots, light reflectors offer a lot of value for the money and are a great entry point for learning how light can change an image.
Take Advantage of Camera Flashes and Diffusers
When you understand that lighting is an integral part of professional photography, you may think about investing in lighting equipment such as a studio strobe, but before you commit, don’t overlook your camera flash!
If you shy away from using it because you find the light is too harsh, there are a number of solutions. One of the best options would be to invest in an external flash. External camera flashes, whether used attached to your camera’s hot-shoe or used off-camera, can give you much more flexibility. For one, they enable you to aim the light rather than have it blasting directly on your subject.
This allows you to bounce the light off a nearby surface like a ceiling or wall. The result is that the light is spread out more evenly and looks less harsh. There are also a variety of flash diffusers available for external flashes that will help you soften the light without having to bounce it off a surface.
If you aren’t ready to invest in an external flash, there are less expensive options for diffusing the light from your camera’s built-in flash. One example is this diffuser for built-in camera flashes. It costs less than $20 and simply clips onto the top of your camera, using frosted plastic to soften the light.
Many photographers also create DIY solutions for diffusing the light from their flashes, such as using various translucent white plastic containers and cutting them so they fit over the flash.
Diffusing your flash might not be the look you’re going for: harsh flash lighting is an aesthetic choice, popularized by American Apparel in the 2010’s. Depending on the look you want to achieve, you may want to experiment with using flash as a stylistic device.
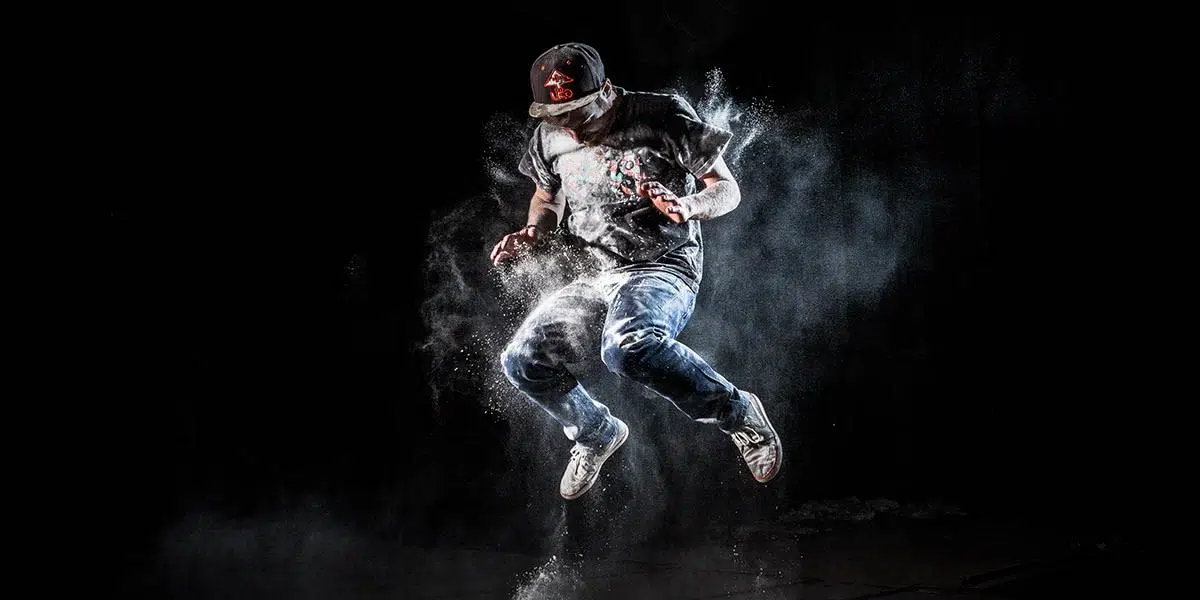
Use Light to Create Interesting Effects

There’s a lot more to lighting than just making sure you have enough of it. You can also use light in a variety of interesting ways that can totally change the mood of your photos. Once you get comfortable creating some of these effects, it will help you with figuring out how to make your photographs look professional.
For example, some techniques you could try out include:
- Shooting during the golden hour. The golden hour is what photographers call the time just after sunrise and just before sunset. This is when you can capture scenes bathed in golden-hued light—which makes for a beautiful photo. Also, since the sun is low in the sky, every subject will cast very long shadows that can create a dramatic effect.
- Create a silhouette. Try shooting a subject in front of a bright light like the setting sun, and manually adjust your camera settings so all you’re left with is a dark silhouette against a background of light. Check out this guide to learn all the ins and outs of silhouettes: Silhouette Photography 101: Master The Basics.
- Shoot in hard light. Shooting in areas or times when there’s lots of bright light and shadows can make for an interesting photo with lots of contrast. For example, look for things that cast interesting shadows onto your scene such as window blinds or a fence. Then capture those shapes or patterns created by the shadows as they fall on your subject. For more info on this technique, take a look at hard light photography advice.
3. Learn How to Edit Photos Like a Professional

Photography is 40% post-production. This was the same of film photography, when in darkrooms photographers would use filters to change contrast, or dodge and burn to create focal points. Our tools now are far more expansive, yes, but the idea is the same: you’re not just recording the image exactly as it was, you’re interpreting your subject matter through your own eye.
It’s not only about how to take photos, you need to learn how to edit them. Photoshop and Lightroom are the professional photographer’s best friends (and sometimes nemesis). Practically any image can benefit from some touch-ups, whether it’s cropping, brightness adjustments, color corrections, or straightening.
It’s worth spending some time learning what the program is capable of. There are lots of helpful tutorials available online, including a bunch on the Adobe website. The best way to learn is by watching and immediately following the demo with your own attempt.
If you don’t have access to Photoshop and aren’t looking to spend the money on it, there are many free Photoshop alternatives.
No matter what photo editing software you use, there’s one rule that remains constant: you should use a light touch when making adjustments. Inexperienced photographers tend to go overboard during editing. Start with a preset look and make small adjustments to develop a consistent body of work. If you make too many drastic adjustments, the final result won’t look realistic (if realistic is what you are going for) and your touch-ups will be distractingly obvious.
4. Learn Your Camera’s Settings

Relying on the camera’s automatic settings is another thing that will hold you back in bettering your skills. While it may work fine at times, you won’t have nearly as much flexibility to get creative with your photography or handle unique situations.
For instance, if you are trying to take a silhouette, your camera may try to capture the wrong details and you’ll end up with a dimly lit subject against a blown out background. If you’re trying to shoot at night, it may give you an extra-long exposure when you don’t want one, and you’ll end up with a blurry mess. Spend some time familiarizing yourself with your camera’s settings, whether they are set via menu, dials or both–it’s a critical step in learning how to make pictures look professional.
Thankfully, for every camera there is a generous YouTuber who has explained the ins and outs of its body, lens and settings, and we love them for it.
For some additional help, here is our complete guide to manual settings on your DSLR camera.
5. Pick Up a Tripod
We’ve already covered some lighting equipment, but there’s one more piece of photography gear you should definitely consider adding to your arsenal.
You might think you don’t need a tripod if you have a steady hand, but a tripod allows you to try a variety of shooting techniques that you can’t do without one. Just a few examples include tethered photography, long exposures, or creating your own 3D images.
A tripod also lets you set up your shot and then take care of other aspects of the scene while keeping your camera ready to go. For example, you might want to line up a shot and then speak to a model, make lighting adjustments, or just wait for the perfect moment.
You don’t have to spend much money to get a quality tripod. For some info on the variety that’s available, read up on these must-have portrait photography accessories.
Thousands of customizations to match your unique style.
Customize your site to tell the story of your brand. Format has nearly 100 templates offering thousands of design variables.
6. Upgrade Your Gear
Using the professional photography tips above, you should be able to vastly improve your results without spending any money. However, if you’re working with sorely outdated equipment and have the budget for some new gear, it might be time to upgrade your camera, lenses, and accessories. For some help deciding between all the options out there, take a look at these guides:
- A Beginner’s Guide to Buying the Right Photography Equipment
- What Are the Best Cameras for Portraits?
- The Best Lenses for Portrait Photography
- The Best Cameras for Landscape Photography
- Level Up With These Landscape Photography Accessories
7. Show Off Your Shots Like a Pro

Now that you know some of the secrets behind how to take professional photos, it’s time to share those beautiful shots with an online photography portfolio. Don’t worry: even if you’ve never built a website before, it’s easy if you use a website builder!
Look for one that offers customizable templates, so you can create an online portfolio website that shows off your style. Another thing to look for is a platform that offers a free trial; this way, you can see if it’s right for you before making any commitment.
Looking for more tips on how to take professional photos?
8 Common Beginner Photography Mistakes (And How To Avoid Them)
Expert Tips for More Powerful Action in Photography
9 Insights for Better Portrait Photography