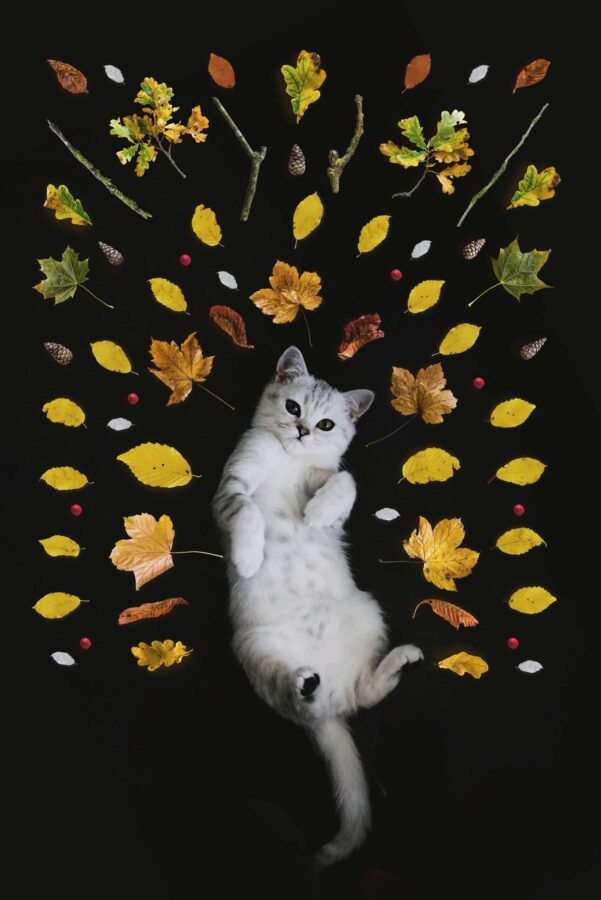
As photographers and pet owners, we know that our furry friends are more than just animals. They are our loyal companions, playmates, and even family members. With the rise of social media, pet photography has become increasingly popular as people want to capture every moment with their pets, from their cute poses to their silly antics.
Additionally, there are opportunities to provide commercial pet photography services to related brands, such as pet health insurance, food, toys, and more. In this article, we’ll share 29 essential tips for mastering pet photography and capturing stunning images of your clients’ four-legged friends.
Preparing for the Photoshoot
1. Tips for selecting the location
One of the first steps to capturing great pet photos is to choose the right location. When selecting a location, consider the background, indoor vs outdoor, and natural lighting. For instance, a neutral background in a studio can help the pet stand out. If you’re shooting outdoors, ensure the location is safe and secure for the animal you’re photographing, and take time of day and available light into consideration.
2. Grooming
Grooming is also an essential step to ensure the animals look their best in photos. Request that clients bathe and/or brush their pet, to help remove any loose fur and unsightly knots–recommending a few favorite pet grooming businesses is another option. Additionally, freshly trimmed nails can help prevent scratches during the shoot. Finally, when appropriate for the client, accessorizing the pet with a cute collar, bandana, or other item can add an extra touch of personality to your images.

3. Essential pet photography equipment
While it’s true that you can capture great pet photos with a smartphone, investing in a quality camera and lens can make a significant difference in the final product, particularly if you wish to focus on commercial work vs standard pet portraiture. A camera with a fast autofocus system and a burst mode is ideal for capturing action shots. Handy, but not absolutely necessary; a tripod can help stabilize your camera for sharp images, while reflectors and lighting equipment can help you achieve the perfect lighting.
4. Create a concept and a shot list
The most engaging animal photos show them in context, or truly highlight the animal’s personality. For example, you can show desire through a photo of a cat looking at its owner opening a bag of food in the kitchen, or the longing of a dog waiting by the front door for its owner to return home, or the connection between a horse and its owner while using the curry brush. If you can say something through your images, it will connect with your viewers on a deeper level.
Camera Settings and Techniques
5. Understanding aperture, shutter speed, and ISO
Understanding the relationship between aperture, shutter speed, and ISO is key to capturing great pet photos. For instance, a wide aperture (low f-stop number) can create a shallow depth of field, which can help the pet stand out against a blurred background. Find an F-stop that helps the camera focus from the tip of the pet’s nose to its ears. Additionally, using a fast shutter speed can help freeze any action, such as a dog running or a cat jumping.
6. Autofocus vs. manual focus
Using autofocus is convenient, but it may only sometimes capture the intended focus point. In contrast, using manual focus can help you achieve sharper and more precise images. Consider using manual focus when the pet is stationary or when you want to focus on a specific part of their body, such as their eyes. A middle ground for both is using aperture priority to help quicken the shooting process.

7. Tips for using natural light effectively
Natural light can produce beautiful images, but it can also be challenging to work with. When shooting outdoors, avoid the harsh midday sun when possible and make use of open shade when you need to photograph during midday hours. If you can, aim for early morning or late afternoon when the light is softer and lower in the sky. During those hours, the sun creates a hazy, golden atmosphere that allows for backlighting, larger patches of open shade, and softer, more direct light when your subject is facing the sun. When shooting indoors, position the pet near a window to capture natural light. Using a reflector can help bounce light onto the animal’s face, reducing any harsh shadows.
8. Using appropriate shutter speed for capturing action shots
If your client’s pet is particularly active, you’ll want to use a fast shutter speed to freeze their motion. A good rule of thumb is to use a shutter speed of at least 1/250th of a second for most pets. If you’re photographing a particularly fast-moving pet, such as a bird or a horse, you may need to use an even faster shutter speed. Using burst mode can help you capture multiple images in rapid succession, increasing the chances of capturing the perfect shot.
9. Selecting the right lens for pet photography
The right lens can make a big difference in your pet photography. A prime lens with a wide aperture (such as f/1.8) can create beautiful bokeh and blur the background, while a zoom lens can help you get closer to the animal without actually moving closer. A macro lens can help capture fine details, such as the pet’s eyes or fur. The short focal lengths in wide-angle lenses create a wide composition. This can help create funny and unusual pictures–experiment with different lenses to find the one that works best for you.
10. Achieving the perfect depth of field
Depth of field refers to the range of distance in the image that appears acceptably sharp. A shallow depth of field can be used to blur the background and create a dreamy, soft look, while a deep depth of field can be used to keep everything in focus. Experiment with different apertures to achieve the perfect depth of field for your pet photography.
Composition and Framing
Composition is another important aspect of pet photography. Being thoughtful about your composition is what can change a good photo to a great photo. Here are some tips to help you frame your shots effectively:
11. Importance of composition in pet photography
Good composition is key to creating an eye-catching pet portrait. The goal of the principles of composition is to emphasize the parts of your image that you want your viewer to notice, and to create an overall feeling of balance when they look at the image. You can achieve this by changing your angle to shooting from across or below the pet, rather than from above–or consider the rule of thirds or leading lines when framing your shot. These tips can create a more balanced, powerful, or visually interesting photo.
12. Rule of thirds
The rule of thirds is a fundamental principle in photography. Imagine the image is divided into nine equal parts with two vertical and two horizontal lines. The rule suggests that important elements of the photo should be placed along these lines or their intersections.

13. Utilizing leading lines and patterns
Leading lines are lines that draw the viewer’s eye into the photo. They can be used to guide the viewer’s gaze toward your pet, such as using a pathway or a fence to lead the viewer’s eye towards your pet.
14. Using the panning technique
If you like abstract photos, you’ll enjoy the panning technique when shooting pet photography. This creative approach is used to emphasize movements and create textures. To execute this method successfully, know where your pet will run to and move your camera in the same direction. Then press the shutter to capture your shot. Try to master this technique before the photoshoot. You can practice by trying to capture images of moving cars or wild animals.
15. Filling the frame
To create a more impactful pet photo, consider filling the frame with your subject. This can help create a stronger connection between the viewer and your pet, and draw attention to their unique features. Not every dog photo has to be taken outdoors. If you choose studio photography, using a plain black or other solid color background will put your client’s pet in the spotlight. It will create a sense of depth and make your images look like professional fine art prints.

16. Focus on the eyes
Like human portraits, emotive pet pictures, especially those featuring dogs, focus on the eyes. You can focus on the eyes to create depth in the image, emphasize an unusual eye color, or create a sense of familiarity. Using a wide aperture (f2.8 or lower) can help enhance that feeling of familiarity and depth. A general recommendation is to capture the emotive images at the end of the shoot. That’s when many pets have used up all their energy and are ready to relax.
Capturing The Pet’s Personality
17. Make them comfortable
If your pet is in a new environment, whether it’s a studio or an apartment, ensure that the pet is comfortable with its surroundings. You cannot rush the pet, so make sure you plan for it. It could take 30-40 minutes before they are comfortable. You can also add your flash into the mix once your pet is comfortable. One trick would be to give the pet a treat every time a flash goes off. The pet will then associate the flash with treats.
18. Timing and patience
When it comes to pet photography, timing is everything. Be prepared to take a lot of photos to capture the perfect shot. Use continuous shooting mode to increase your chances of getting that perfect moment. Patience is also key, especially if you’re working with a nervous or uncooperative pet. Take breaks and give the animal plenty of time to relax and feel comfortable.
19. Encouraging and capturing natural expressions
The key to capturing a pet’s personality is to let them be themselves. Encourage natural behavior by playing with them, making noises, or using toys–asking the pet owner to help or having an assistant will leave your hands free to capture the moment. Observe your subject and include its strengths for the most natural pictures. Capturing candid moments will result in more authentic and memorable photos. Try to avoid making loud noises or sudden movements that may startle them.

20. Tips for photographing different types of pets
When photographing dogs, capture them at their eye level to create a more personal and engaging image. For cats, focus on their eyes to capture their unique personalities. For birds, be patient and let them get used to your camera before you start taking photos. Each pet has its own quirks, so take the time to understand their personality and use it to create beautiful images.
21. Capturing the bond between pets and their owners
The bond between a pet and its owner is special and capturing this in a photograph ensures a happy client. Try to include the owner in the photo with their pet, showing the love and connection between them. Try to capture natural interactions between the two, such as snuggling or playing. Additionally, be sure to pay attention to the pet’s body language, as it can tell a story about their relationship with their owner.
22. Fun props and creative ideas
Incorporating fun props and creative ideas can add a unique element to your pet photography. Remember never to dress your pet in anything that might be unsafe or uncomfortable for them. Consider using a colorful background or incorporating fun accessories such as hats, bow ties, or a Hawaiian shirt. You can also experiment with creative ideas, such as dressing up your pet in costumes, creating a themed photoshoot, or using different angles or framing techniques to create a dynamic image. Whatever you do, be sure to keep your pet’s safety and comfort in mind when using props and costumes and let your client’s pet be the star of the photo.
23. Use different sounds for attention
Use different sounds or create noises to grab the pet’s attention. This could be a whistle in your mouth, or an animal call. Don’t overuse the noise as it only takes a quick noise to get their attention. This is most successful when the photographer or their assistant is the only one making the noises. If there are many people in the room trying to get the pet’s attention, it can confuse and stress the pet.

Post-Processing Tips
24. Editing software recommendations
There are many editing software options available to use, from free programs like GIMP to professional programs like Adobe Photoshop or Lightroom. Choose a program that suits your needs and skill level. If you’re just starting, there are many online tutorials and classes available to help you learn the basics.
25. Basic edits (Exposure, White Balance, Cropping)
Basic edits like adjusting exposure, white balance, and cropping can make a big difference in pet photos. Use exposure adjustments to correct under or overexposed images. Adjust the white balance to correct any color cast in your photos. Cropping or the Fill tools can be used to remove any unwanted distractions or to create a more dynamic composition.
26. Enhancing your pet’s eyes
The eyes are often the focal point of a pet photo, and enhancing them can make a big difference. Use the dodge tool to brighten the eyes and the burn tool to darken any distracting highlights. You can also use the sharpening tool to highlight the details in the eyes.
27. Retouching fur
Retouching fur can be a challenge, but it’s important to remove any distracting elements or blemishes. Use the clone stamp or healing brush tool to remove any unwanted objects or to smooth out any rough spots. Be careful not to overdo it, as you want to maintain the natural look of your client’s pet.
28. Utilizing filters and presets
Filters and presets can be used to add a creative touch to your photos. There are many options available, from vintage film looks to bold and colorful effects. Use them sparingly and make sure they enhance the image rather than distract from it.
29. Saving and exporting files for different purposes (Print, Social Media, etc.)
Consider the purpose of your photo when saving and exporting your files. For example, save your photo in a high-resolution format if you plan on printing it. If you plan on posting it on social media, consider resizing the image to meet the platform’s specific requirements. By doing so, you can ensure that your photo looks its best, regardless of its intended use.
It is no secret that mastery of pet photography requires a lot of practice. The more time you spend with pets and the more you photograph them, the better you’ll understand how to work with them.