Ibrahim setzte sich mit Format um seine Tipps für die Dokumentation deiner Kunstwerke mit dir zu teilen und dir zu zeigen, wie du deine Arbeit zu Hause oder in deinem Studio mit einem geringen Budget optimal dokumentieren kannst.
Kannst du dich und deine Arbeit vorstellen?
Mein Name ist Ibrahim Abusitta. Ich bin ein Künstler aus Toronto.
Ich habe an der OCAD University Fotografie studiert, daher habe ich auch meinen fotografischen Hintergrund.
Ich bin sozusagen in die Dokumentation von Kunstwerken hineingestolpert: Künstler in meinem Umfeld baten mich, ihre Kunst zu dokumentieren, und ich wurde von Galerien und Auktionshäusern beauftragt. Ich hatte sowohl die Verbindungen zur Kunstwelt als auch eine technische Fotoausbildung, und so habe ich meine Fotopraxis entwickelt.
Welche Tipps hast du, um deine Arbeit zu dokumentieren?
Ich würde dir empfehlen, vor der Aufnahme von Bildern dafür zu sorgen, dass du die richtige Beleuchtung hast; darauf können wir später eingehen.
Stell sicher, dass du eine weiße Karte hast; das ist immer hilfreich. Eine weiße Karte ist im wahrsten Sinne des Wortes eine weiße, flache Form, vielleicht aus Schaumstoff, die du verwenden kannst, um das Licht zu reflektieren. Die weiße Karte kann verwendet werden, um Schatten auszugleichen und das Licht gleichmäßiger zu machen.
Die richtige Beleuchtung ist eines der wichtigsten Dinge, die du für eine erfolgreiche Dokumentation tun kannst, und eine weiße Karte ist ein billiges und einfaches Werkzeug.
Welche Fehler siehst du, wenn Menschen ihre Arbeit dokumentieren?
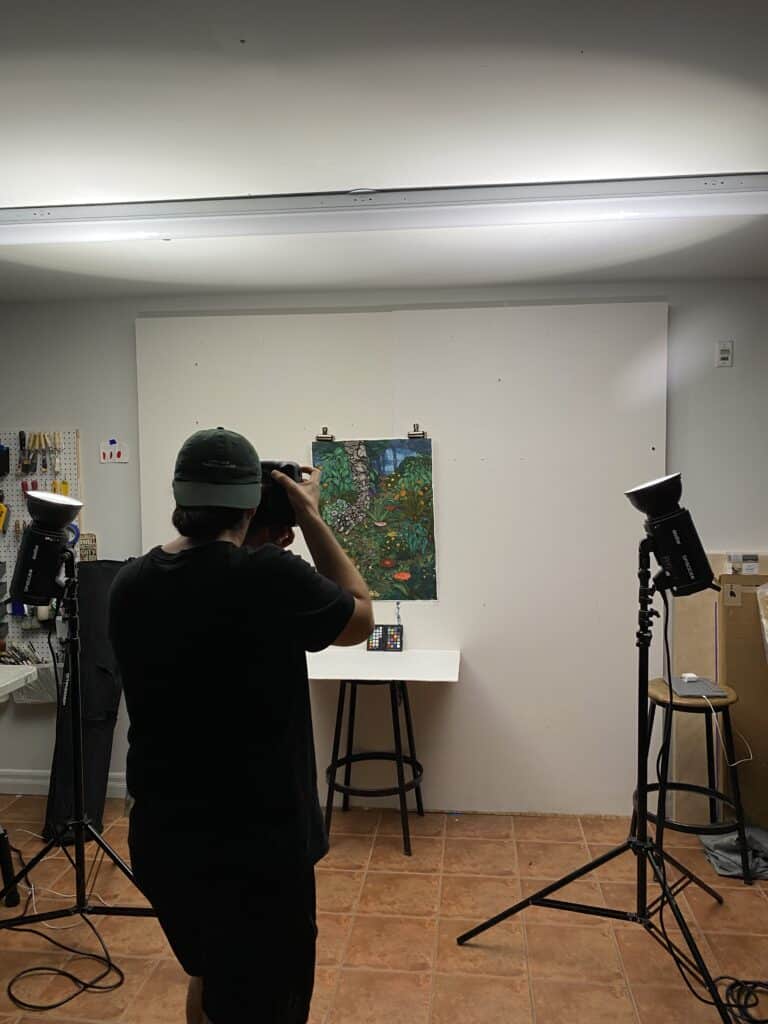
Einer der häufigsten Fehler, den ich sehe, wenn Menschen ihre Arbeit dokumentieren, ist, dass sie unbeabsichtigt zwei sehr unterschiedliche Lichtquellen verwenden. Zum Beispiel verwenden sie sowohl das Licht aus dem Fenster als auch das Licht im Raum. Die eine ist warm (Lichtquelle im Raum), die andere kühl (das Fenster). Die verschiedenen Lichtquellen wirken sich unterschiedlich auf die Farben des Kunstwerks aus. Wenn sie das Foto dann in der Nachbearbeitung bearbeiten, wird es sehr schwierig, die Beleuchtung auszugleichen.
Viele Kreative haben keinen Zugang zu der Ausrüstung, die Profis für ihre Arbeit verwenden. Welche erschwinglichen, unverzichtbaren Ausrüstungsgegenstände würdest du denjenigen unter uns empfehlen, die keine Fotografen sind?
Nichtprofessionellen Fotografen würde ich empfehlen, sich Photoshop oder eine andere Bildbearbeitungssoftware zuzulegen. Viele haben diese Software bereits für andere Bereiche ihrer Praxis, aber wenn du sie nicht hast, solltest du sie dir zulegen. Es ist wichtig, dass du deine Bilder nachbearbeiten kannst.
Außerdem empfehle ich, wenn möglich, ein Stativ oder eine Art Behelfsstativ. Es gibt welche für Handys und für kleine Kameras. Es gibt sogar Tischstative, wenn du etwas Günstigeres suchst. Wirklich alles, um deine Kamera zu stabilisieren. Damit reduzierst du die Bewegungen der Kamera, um ein scharfes Bild zu erhalten.
Wenn du mehr Geld zur Verfügung hast, würde ich dir eine Farbkarte empfehlen, mit der du die Farbbalance wirklich bestätigen kannst. Farbkarten sind ein Bonus, aber sie helfen dir wirklich bei der Farbbalance deiner Bilder. Eine Farbkarte ist im Wesentlichen eine Karte mit Primärfarben (Gelb, Cyan, Magenta) sowie Weiß und Grau. Du machst ein Foto davon in der Umgebung, in der du dein Kunstwerk dokumentierst. Später in der Nachbearbeitung wählst du die graue oder die weiße Farbe auf dieser Farbkarte aus, und sie erkennt automatisch die Temperatur der Lichtquelle, sodass du dein Gemälde oder deine Skulptur viel einfacher ausgleichen kannst.
Hast du noch andere Tipps für die Beleuchtung von Dokumentationen?
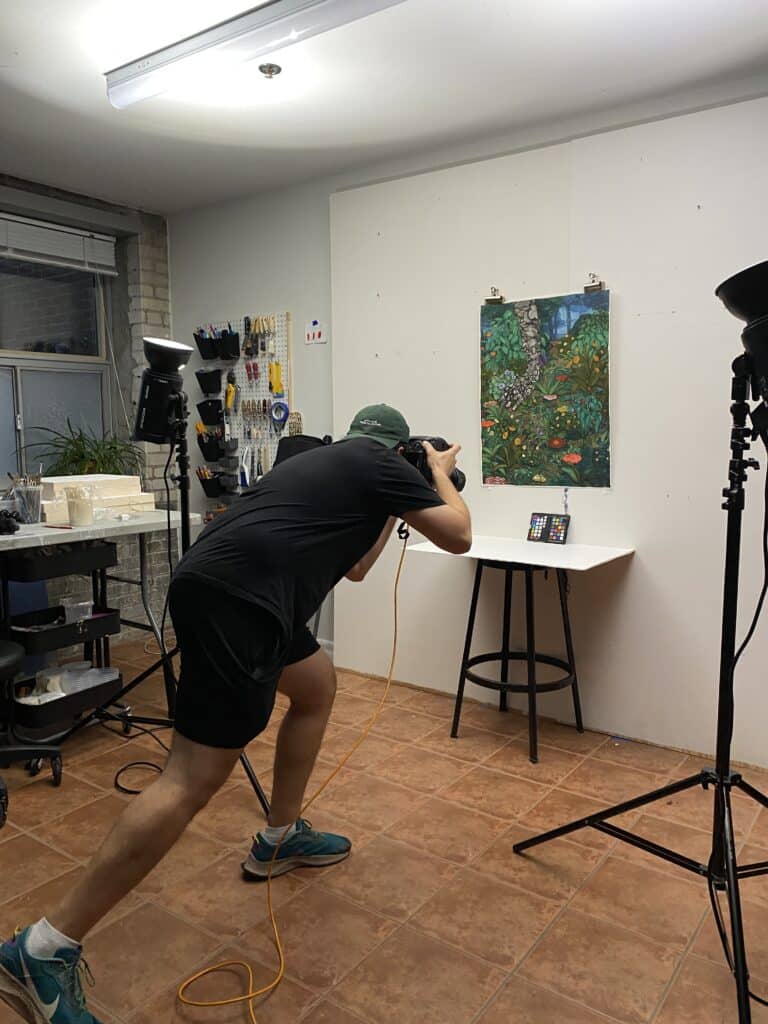
Wenn ein Künstler oder eine Künstlerin kein professionelles Beleuchtungsset hat, gibt es ein paar Möglichkeiten, die du in Betracht ziehen kannst, um deine Arbeit zu beleuchten. Wenn du ein Fenster hast, das nach Norden ausgerichtet ist, fällt in der Regel Tageslicht hindurch, das weich genug ist und gut auf deinem Kunstwerk aussieht. Allerdings musst du die Richtung des Lichts beachten; normalerweise wird das gesamte Kunstwerk nicht gleichmäßig beleuchtet, und hier kommt eine weiße Karte ins Spiel, um es auszugleichen. Normalerweise stellst du deine weiße Karte also vor das Fenster und dein Kunstwerk dazwischen.
Die zweite Möglichkeit wäre, das Licht in deinem Zimmer zu kontrollieren und alles andere auszublenden, egal ob es nachts sein muss oder du deine Fenster verdunkeln musst. Dann würdest du mit Lichtern/Lampen/Innenbeleuchtung beleuchten, anstatt das Tageslicht zu nutzen.
Eine dritte Möglichkeit wäre, in ein paar Lampen zu investieren, in die du genau die gleiche Glühbirne einsetzen kannst - das heißt, du hättest zwei gleiche Glühbirnen, um die Arbeit auf der linken und rechten Seite auszugleichen.
Wenn du ein Stativ verwendest, musst du dich nicht so sehr um die Helligkeit des Lichts kümmern, weil du länger belichten kannst.
Welche Art von Beleuchtung würdest du empfehlen? Kannst du eine normale Lampe verwenden?
Ich denke, du könntest eine normale Lampe verwenden und damit durchkommen, vor allem wenn du Photoshop oder ein ähnliches Nachbearbeitungsprogramm hast.
Du kannst warmes Licht oder kühles Licht verwenden. Wichtig ist, dass du die Lichter nicht vermischst, denn in der Nachbearbeitung korrigierst du das alles. Die meisten professionellen Geräte verwenden eher kühles Licht. Wenn es also möglich ist, nimm einfach ein paar kühle Glühbirnen.
Wie gehst du mit Schatten oder Blendung um, wenn du deine Arbeit dokumentierst?
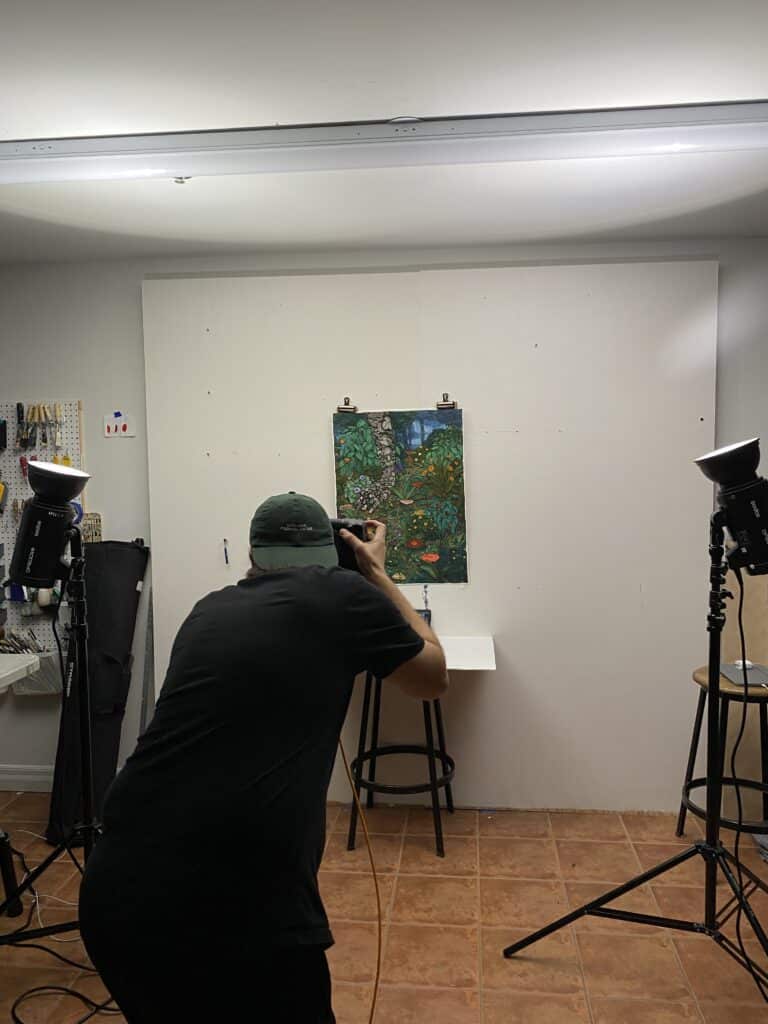
Normalerweise musst du dir das Kunstwerk ansehen und herausfinden, warum die Blendung auftritt und ab welchem Winkel du die Blendung nicht mehr siehst. Der Schlüssel dazu ist, deine Position mit der Kamera und die Position des Lichts auszugleichen. Manchmal musst du dich höher oder tiefer an das Kunstwerk heranwagen, bis du die Blendung aus dem Kamerawinkel nicht mehr siehst.
In der Nachbearbeitung kannst du das Ganze dann ausgleichen, indem du das Werk mit Keystones versiehst, damit es sich anfühlt, als wärst du direkt davor.
Kannst du erklären, was Keystone ist?
Keystoning bedeutet, den Winkel und die Neigung des Werks in der Nachbearbeitung anzupassen. Stell dir vor, du schaust dir ein Rechteck frontal an. Jetzt stell dir vor, dass du es nach hinten oder nach vorne kippen musst. Das ist etwas, was du normalerweise tun musst, wenn du ein Bild von einem Projektor auf eine Wand projizierst und die Dinge quadratisch sein sollen. Beim Keystoning geht es also darum, die Perspektive der Ecken eines Rechtecks oder Quadrats auf den Betrachter zu oder von ihm weg zu verschieben, bis sie wieder einen 90º-Winkel bilden.
Welche Tipps hast du für den Fokus oder die Schärfe. Wie vermeidest du unscharfe Bilder?
Der Schlüssel zur Vermeidung eines verwackelten Bildes ist die Verwendung eines Stativs. Oder ein behelfsmäßiges Stativ und die Einstellung deiner Kamera auf einen Zwei- oder Zehn-Sekunden-Countdown, damit das Verwackeln des Bildes nach dem Drücken des Auslösers nachlässt, wenn der Zehn-Sekunden-Timer abgelaufen ist.
Wenn du deine Aufnahme gemacht hast, zoome hinein und überprüfe, ob dein Bild scharf ist.
Du hast behelfsmäßige Stative erwähnt. Was sind Beispiele für behelfsmäßige Stative?
Deshalb musste ich mir in verschiedenen Situationen alle möglichen Behelfsstative basteln. Du kannst alles verwenden, was stabil und flach ist: eine Tischplatte, einen Stapel Bücher, einfach alles, was dein Handy oder deine Kamera in Position halten kann. Manchmal reicht schon die Tischplatte und das, was du brauchst, um die Kamera zu heben oder zu senken.
Dadurch, dass du es nicht in der Hand hältst, ist die Wahrscheinlichkeit geringer, dass das Bild verschwimmt.
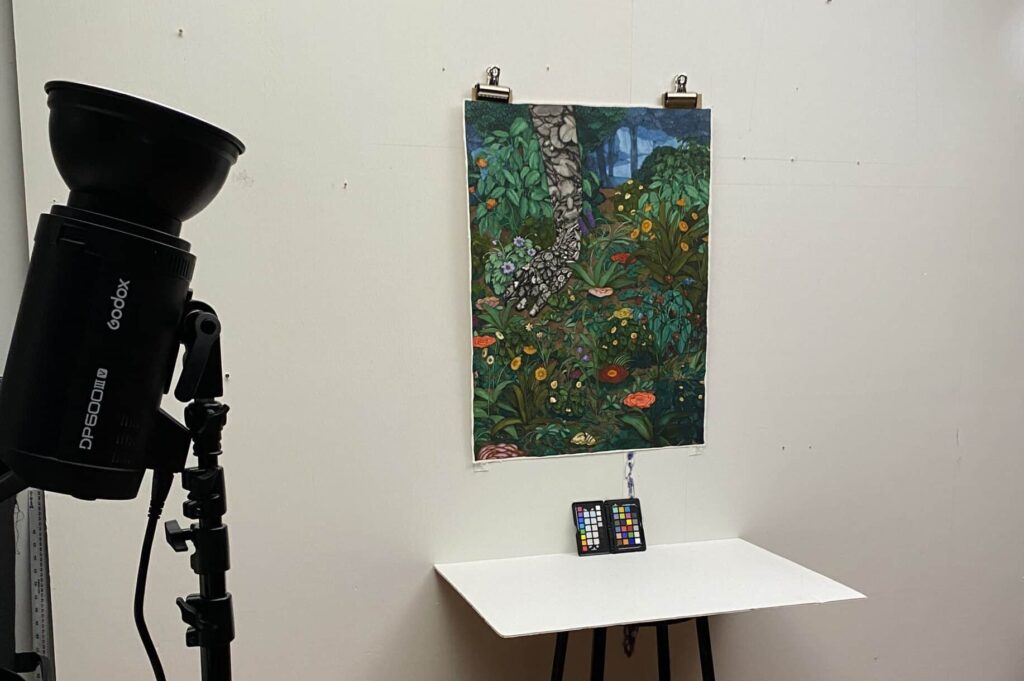
Wie fängst du die Oberflächentextur eines Werkes ein?
Ich empfehle, die Oberflächenstruktur eines Werks mit einer Lichtquelle von oben zu beleuchten, um einen Schatten unter die Textur zu werfen. Daran sind wir gewöhnt, wenn wir das Kunstwerk in einer Galerie sehen, damit es für uns "richtig" aussieht. Dort kommt die Lichtquelle immer von oben.
Was empfiehlst du für die Gestaltung von Fotos?
Bei der Gestaltung der Fotos solltest du bedenken, dass wir die Arbeit nur dokumentieren und es sich nicht um eine künstlerische Aufnahme handelt. Dein Bildausschnitt sollte also die Größe des Kunstwerks innerhalb des Rahmens maximieren. Je größer dein Bild ist, desto mehr Details wirst du einfangen. Du musst es nur zentrieren und den Rahmen so weit wie möglich ausfüllen.
Was ist, wenn du etwas wie eine Ausstellung oder ein Kunstwerk in einer bestimmten Umgebung dokumentierst? Hast du Tipps für das Dokumentieren in situ?
Meine Empfehlung für die Aufnahme einer Ausstellungsinstallation ist, dass du versuchst, mit deinem Objektiv nicht zu weit zu gehen und das Bild auf der vertikalen Achse zu zentrieren.
Du solltest auch den Blickwinkel des Galeriebesuchers in deine Aufnahme einbeziehen. Also keine niedrigen und keine hohen Winkel, sondern Abwechslung. Achte auf Details, geh in die Breite und lass den Betrachter den Raum erleben.
Hast du Tipps für das Fotografieren von dreidimensionalen Arbeiten?
Mein wichtigster Tipp für das Fotografieren dreidimensionaler Kunst ist eine Voute. Das ist ein gebogener Hintergrund, der es dir ermöglicht, dein Kunstwerk zu fotografieren, ohne eine Horizontlinie zu sehen. Eine Voute ist im Grunde genommen nur ein Stück nahtloses Papier, das du in einem gekrümmten Winkel von der Wand oder der Stütze weg aufstellst. Du kannst dir im Kunsthandel oder in einem Fotoladen eine Rolle breites weißes Papier besorgen.
Wenn du zu Hause keine Voute einrichten kannst, ist eine andere Möglichkeit, nur eine breite Fläche zu haben und den Rand des Papiers zu vermeiden. Das Wichtigste dabei ist, die Skulptur zu fotografieren, ohne eine Horizontlinie zu sehen. Horizontlinien (z. B. dort, wo der Boden auf die Wand trifft) können bei einem 3D-Objekt sehr störend sein, weil diese Linien das Werk optisch einschneiden. Wenn du die Horizontlinie ausblendest, kannst du die Skulptur für sich allein betrachten.
Die andere Empfehlung ist, ein Stativ aufzustellen, die Kamera an der gleichen Stelle zu halten und dein Kunstwerk mindestens viermal zu drehen, damit der Betrachter einen vollen Drei-Sechzig-Blick auf dein Kunstwerk hat. Wenn du die Kamera an der gleichen Stelle hältst, bewegt sich dein Werk, nicht der Betrachter.
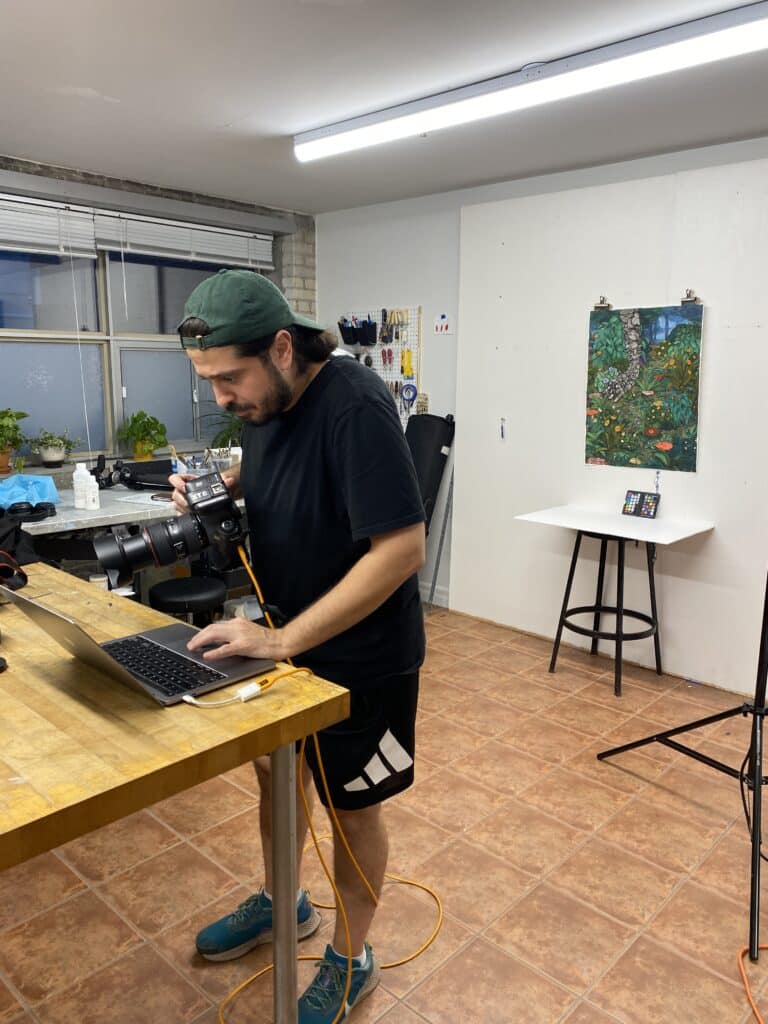
Welche Tipps hast du für das Bearbeiten und Retuschieren? Welche Top-Programme oder Tools verwendest du?
Für die Bearbeitung und Retusche würde ich dir raten, dir viele Tutorials [auf youtube] anzusehen, die sich speziell mit den Dingen befassen, die du für diese Aufgabe lernen musst, vor allem mit der Farbkorrektur.
Das andere Werkzeug, das oft zur Dokumentation verwendet wird, ist das Transformationswerkzeug, mit dem du die Perspektive verzerren oder die Kanten verziehen kannst. So kannst du deine 2D-Arbeit wieder quadratisch aussehen lassen. Es kann sehr schwierig sein, Verzerrungen in deinen Fotos zu vermeiden, deshalb kannst du sie mit diesem Werkzeug korrigieren.
Und das Programm, das ich immer benutze, ist Adobe Photoshop. Wenn du diese Software bekommen kannst, ist sie sehr hilfreich. Es gibt noch andere Varianten dieses Programms, aber Photoshop ist ein Industriestandard.
Hast du irgendwelche besonderen Tipps, wenn du dein Handy für die Arbeit benutzt?
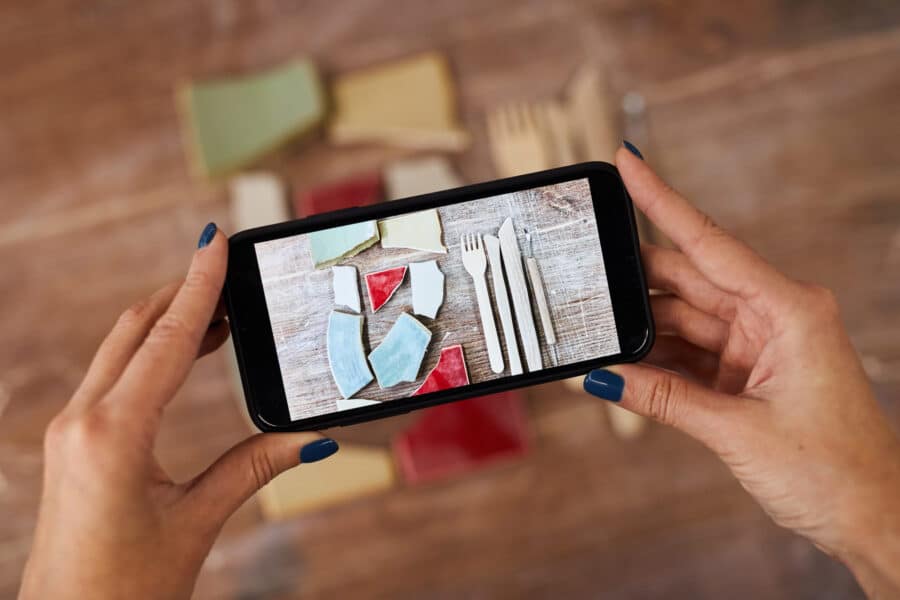
Ich habe einen sehr wichtigen Tipp für das Fotografieren mit Handys: Du musst das Objektiv abwischen. Wir halten unsere Handys den ganzen Tag in der Hand und unsere Finger sind ständig auf dem Objektiv. Als Erstes solltest du also dein Objektiv gründlich abwischen.
Der andere Tipp ist, den Selbstauslöser und die Schärfespeicherung zu nutzen, die du durch Gedrückthalten des Bildschirms aktivieren kannst, damit die Kamera den Fokus nicht verschiebt, wenn sie etwas Neues vor dem Objektiv sieht.
Hast du noch andere Tipps für die Dokumentation?
Zwischen den Kameraeinstellungen und den Photoshop-Einstellungen kann eine Menge automatisiert werden. Wenn du also noch nicht über die nötigen Kenntnisse verfügst und noch lernst, solltest du einige der automatischen Einstellungen nutzen. Das Gleiche gilt für die Farbkorrektur. Wenn du keine Farbkarte bekommen konntest, kannst du den automatischen Weißabgleich verwenden und in neun von zehn Fällen sieht er ziemlich genau aus. Wenn du das Gefühl hast, dass der Weißabgleich nicht stimmt, kannst du ihn manuell anpassen, aber mit der automatischen Einstellung kommst du dem besten Ergebnis am nächsten.
Wenn du kein Geld für eine Farbkarte hast, gibt es auch eine so genannte Graukarte, die nur eine graue Farbe enthält und von deiner Software verwendet wird. Mit einer Graukarte oder einer Farbkarte kannst du die Nachbearbeitung beschleunigen und den Farbabgleich einfacher und genauer gestalten.
Versuche vor allem, die Nachbearbeitung entweder im Raum mit deiner Arbeit oder kurz nach dem Shooting zu machen, wenn die Erfahrung der Arbeit noch frisch ist. Es ist ein großer Vorteil, wenn du die Vorlage zur Hand hast, um sicherzustellen, dass die Farbbalance so gut wie möglich ist.
Hast du irgendwelche Tipps für Profifotografen, die in die Dokumentation einsteigen wollen?
Mein großer Tipp für Fotografen, die ihre Arbeit dokumentieren wollen, ist, dass die beste Beleuchtungsmethode darin besteht, das Blitzlicht in die Decke zu schießen und es dann auf deine Arbeit zurückprallen zu lassen. So wird das Licht weicher und ist nicht zu hart.
Ich würde jedem Fotografen auch empfehlen, eine Aufnahmesoftware namens Capture One. Auf diese Weise kannst du Aufnahmen von der Kamera direkt auf deinem Laptop machen, und zwar auf eine Art, die man "tethered" nennt. Das ist einfacher, als mit der Kamera zu fotografieren und auf die Rückseite des Bildschirms zu schauen, denn der Monitor deiner Digitalkamera ist in der Regel von schlechterer Qualität als das Bild, das du auf deinem Laptop siehst. Mit dieser Methode kannst du also direkt zur endgültigen Bildquelle gehen und wissen, ob dein Bild gut aussieht oder nicht.
Genieße die Arbeit von Ibrahim Abusitta über seine Online-Portfolio-Website, erstellt mit Format, wo du ihn auch für die Dokumentation deiner Arbeit kontaktieren kannst. Folge ihm auf Instagram um seine neuesten Arbeiten und Berichte über Veranstaltungen zu sehen.
